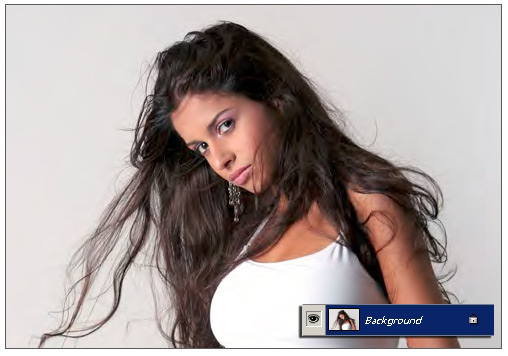
Below is the original image I will use in conjunction with Fluid Mask.
Though the background area is a neutral color and is normally a snap to isolate; it’s the transition between the fine hairlines and the background that can prove difficult and time consuming to render in Photoshop.
Step 1 – Start Fluid Mask Filter
With the target Layer active (Background), go to the Filter>Vertus>Fluid Mask menu command, as captured below.
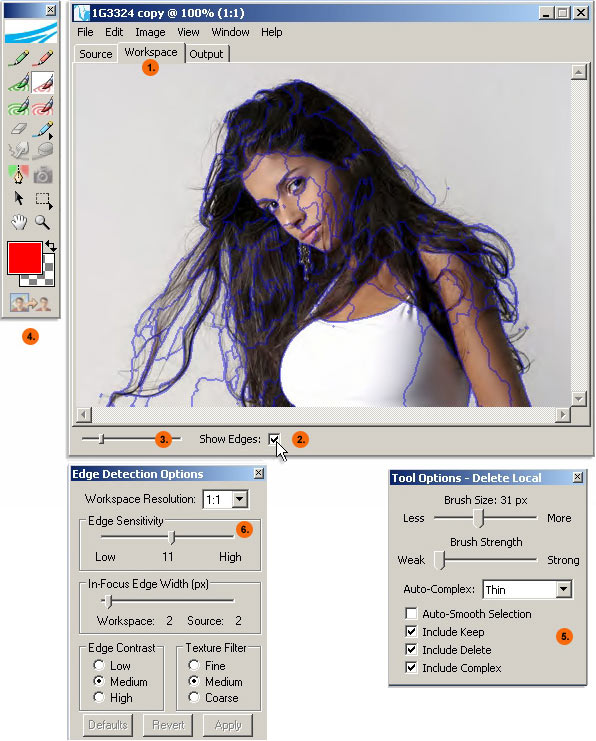
Step 2 – Auto Edge Detection
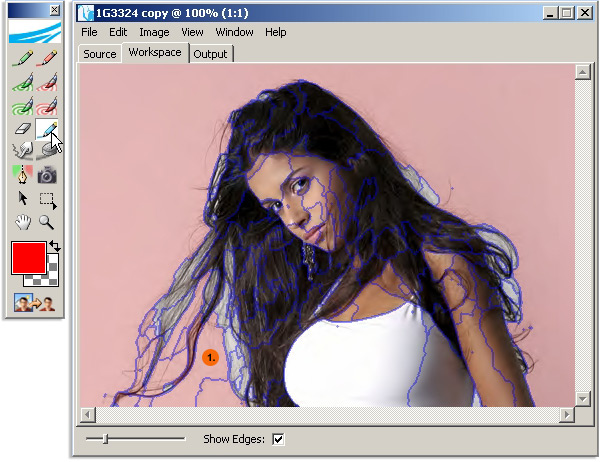
Fluid Mask instantly renders an Edge Detection scan of the image and displays a Workspace (1) with defined pockets of transitions at the default Edge Detection Options Palette settings (6).
In this particular case the default Edge Detection suited just fine.
Other points of interest (User interface related):
- Toggle Show Edges for on screen/off screen of Edge Detection preview.
- (Delete/Keep/Complex) Mask Overlay Opacity Slider control.
- Photoshop like (Masking) Toolbar Panel.
- Active Tool Options Palette (Equivalent to the Photoshop Options Bar parameters for the active Tool)
With the Edge Detection in place, we now need to define areas to KEEP and areas to DELETE.
Obviously, the grey background will be the focus of deletion.
- Activate the Delete Local Brush on the Toolbar (Shift + D)
- Set Delete Brush Tool Option’s: Brush Size, Strength and choice of Actions.
- Then click in the areas (in my case all the grey) outside the model to flood fill for deletion.
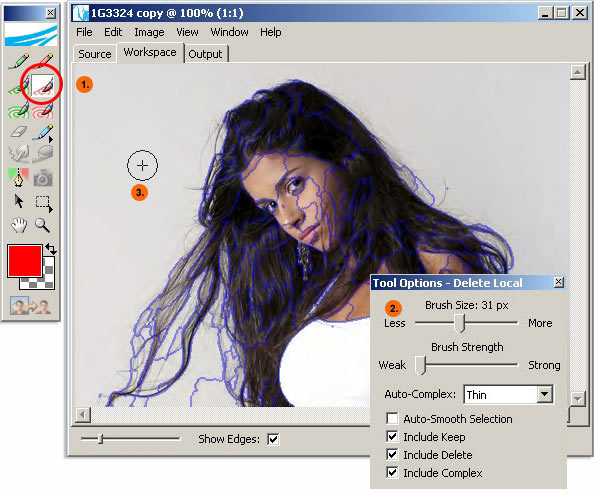
As you can see below, not all areas were flood filled.

Simply continue with the Local Delete Brush onto those other areas (1).
Step 4 – Apply KEEP Mask
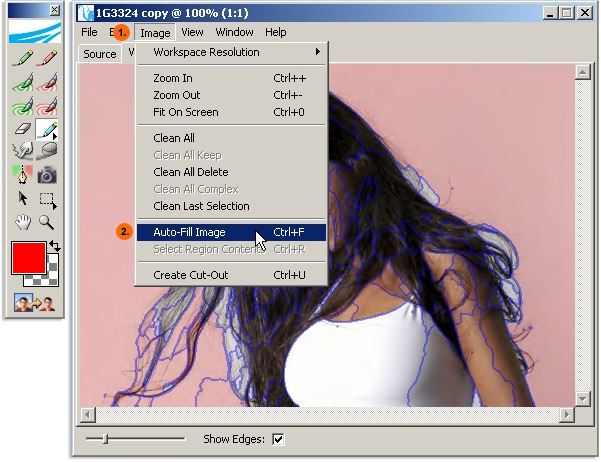
Now lets define the remaining of the image as a KEEP Mask.
- Click the Image menu command option.
- Then select Auto-Fill Image (Ctrl+F) from the context menu list, as captured below.
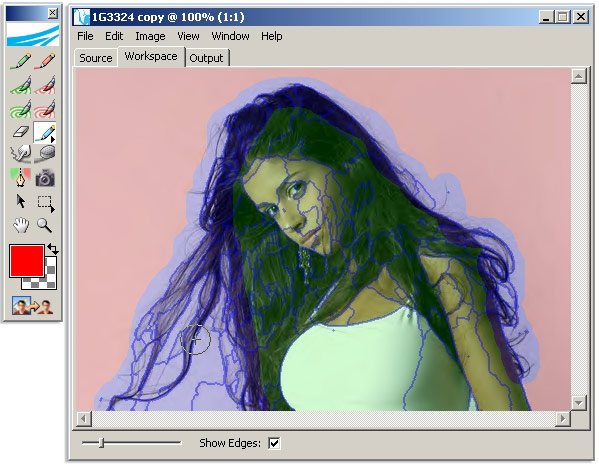
So far we applied auto Edge Detection (blue overlay lines), applied a DELETE Mask (red overlay fill) and a KEEP Mask (green overlay fill).
As you can see there are quite a bit of fly away hairline’s that are not clearly defined, in either in the Keep or Delete Masked areas.
So now we need to apply an EXACT Complex Brush to the entire edge of the hairline so that Fluid Mask can accurately detect those complex transitions.
- Active the Exact Complex Brush from the Toolbar.
- In the Tool Options Palette adjust the Brush Size and set the Complex actions.
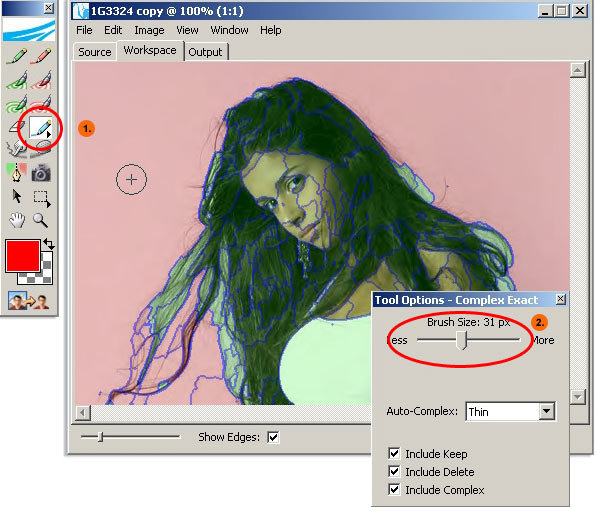
Then brush to fill the boundary of the hairline as I have captured below. (purple overlay)
Then click the Cut-Out (Ctrl+U) Toolbar (encircled in red below) command icon to render the output.
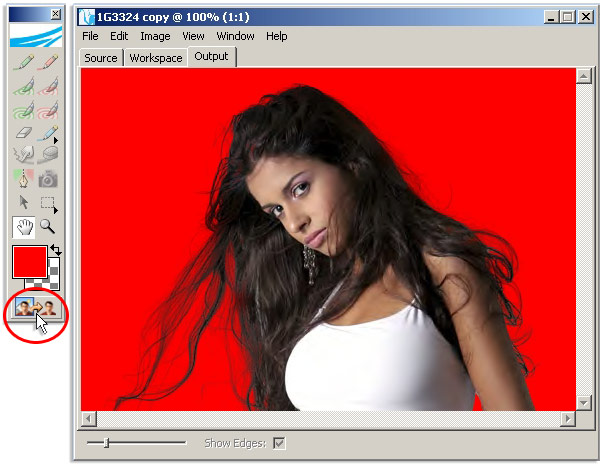
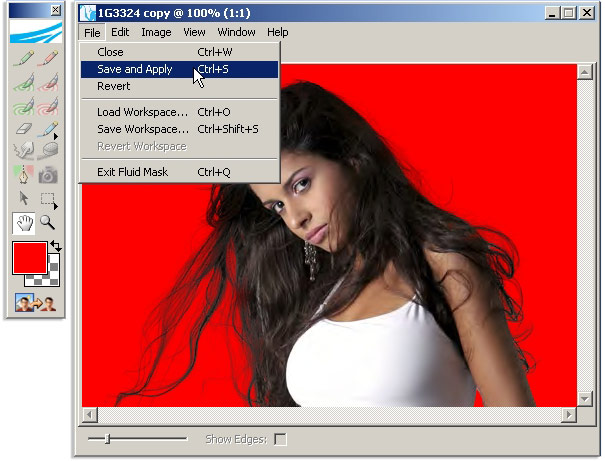
Finally, go File > Save and Apply (Ctrl+S) menu command option to return the cutout back to Photoshop.
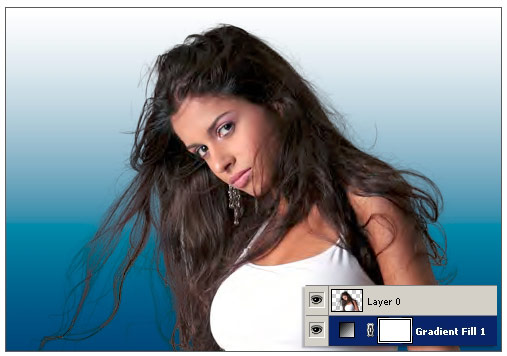
Though the original image Layer was a (locked) Background Layer, Fluid Mask returns it as a free floating Layer with exact transparency from the above process.
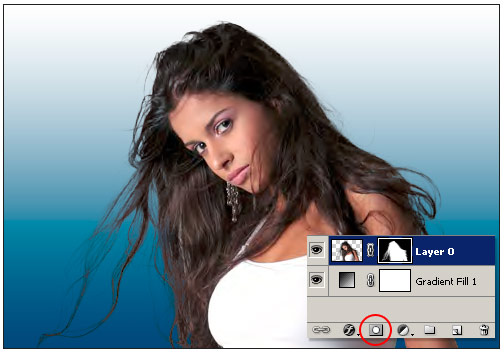
To see the benefit of the cut-out, I added a Gradient Adjustment Layer for contrast.
Quite remarkable! No halo’s and the transition of the complex hairlines appear flawless.
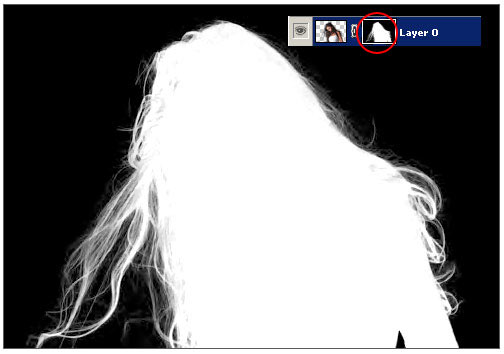
To further realize the complex mask, let’s capture the cut-out as a permanent Layer Mask into this Photoshop file.
Ctrl+Click the Layer 0 Thumbnail (encircled in red below) to activate the cut-out selection (marquee lines).
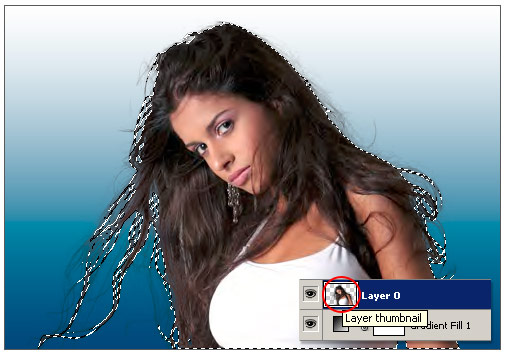
Then click the Add New Layer Mask icon command located at the bottom of the Layers Palette (encircled in red below).
Then Ctrl+Click onto the Layer Mask Thumbnail (encircled in red below) to preview it as a live Alpha Channel.