This tutorial assumes you have Version Cue installed with your choice of Standard or Premium editions of the Adobe Creative Suite.
This is a great addition to the Creative Suite (shipped with Standard & Premium additions) designed to speed up workflow and file management to both the standalone or multiple users.
By far a breakthrough in providing seemless integration, security & management with your projects and with the rest of the Creative Suite applications.
For the sake of brevity and the fact that I use it as a standalone user (non shared projects) this tutorial will just break the ice to get you aquainted.
To begin using Version Cue, the Version Cue workspace has to be turned on and then has to be enabled for each of the applications (in this case just Photoshop) that need access to that workspace.
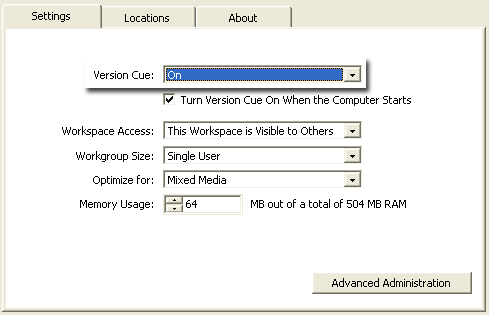
Enable the Version Cue Workspace:
Click the Version Cue option via the Control Panel (Mac: System Preferences).

Then select ‘On’ from the ‘Version Cue’ drop down list as I have captured below, Then OK. to commit changes.
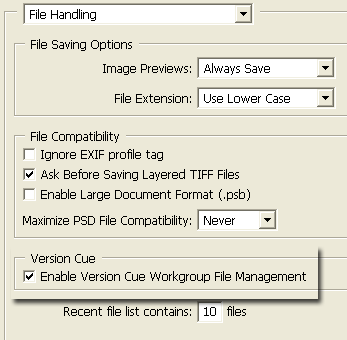
Enable Version Cue in Photoshop:
Open Photoshop CS, then go ‘Edit/Preferences/File Handling (Mac: Photoshop/Preferences/File Handling) and select ‘Enable Version Cue Workgroup File Management’ as I have highlighted below, then click OK to commit the changes.
Close and restart Photoshop CS.
Create A Version Cue Project
A. Choose ‘File/Open’ to open an existing design/image from your hard drive.
B. Create a new design/image from scratch within Photoshop and choose ‘File/Save’ or ‘File/Save As’.
I used option B (File/Save As) above from an existing mock design.
Notice the new ‘Version Cue’ button (lower left) option as I have captured below in my mock image.
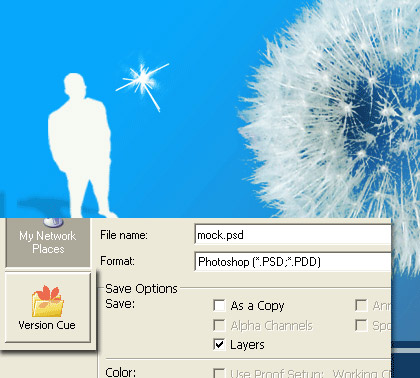
Click this Version Cue option to enter the Version Cue management workspace.
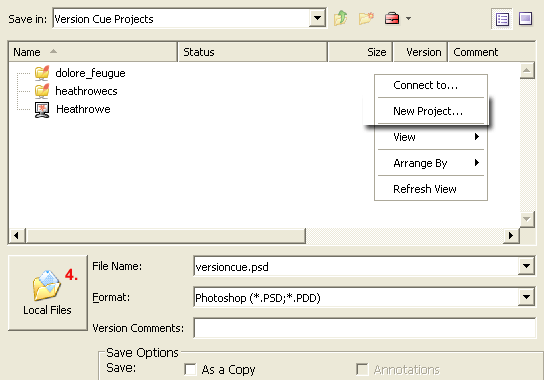
You should get a silimaler screen as I have captured below.
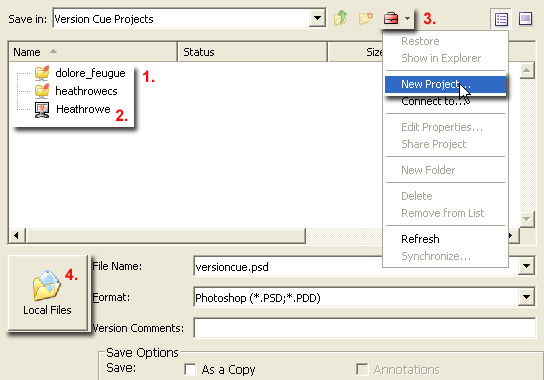
The above show a standard Save Dialog plus a few features exclusive to the Version Cue Workspace.
1. Current Project Files
2. Current Project Version Cue Workspace name.
3. Workspace or Project related options. Of importance to this tutorial, the ‘New Project’ option.
4. Revert back to Local (non Version Cue) view.
Select number 3 option from the above capture to create a New Project and give it a friendly user name.
Alternatively, Right Click/Option Click anywhere inside the main window and choose ‘New Project’ as I have captured below.
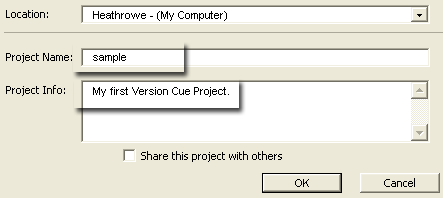
At the next prompt, enter your new Project name and enter a descriptive comment related to your project then OK to commit.
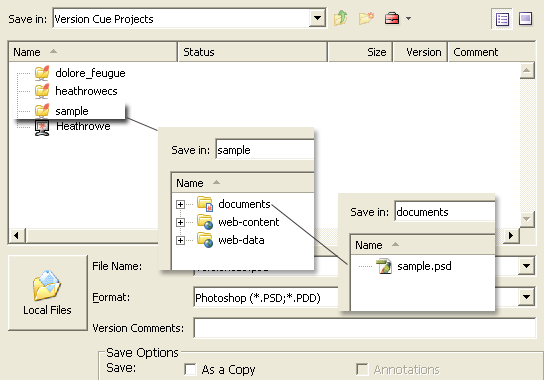
You now have a new ‘sample’ project folder to your files into, as captured below.
Double click the new ‘sample’ project folder and in there are default folders to store project elements.
Store your Photoshop files into the ‘Documents’ subfolder as I have captured below. (The remaining two sub folders are for Golive CS Version Cue related projects)
Now you have your first sample project that contains a single design element.
Back into Photoshop with that same design element open, make some editions or changes to the layered composition.
I added a basic menu text navigation.

1. Add new elements (or edits)- in my case a new navigation
2. Notice the Document Caption – In Use By Me – A version Cue management feature.
3. Now lets Save the changes. But this time we have a new menu command ‘Save A Version’. Choose that as I have captured above.
Upon selecting ‘Save A Version’ you are prompted with the following screen.

Tells you what Version this is and ask’s you for a descriptive comment for this version.
Click ‘Save’ to commit changes.
This takes you back to your Document view.
Finally, go back to ‘File’ menu command and notice the ‘Versions’ command is active.
Click that to view the versions available for this project file as I have captured below.
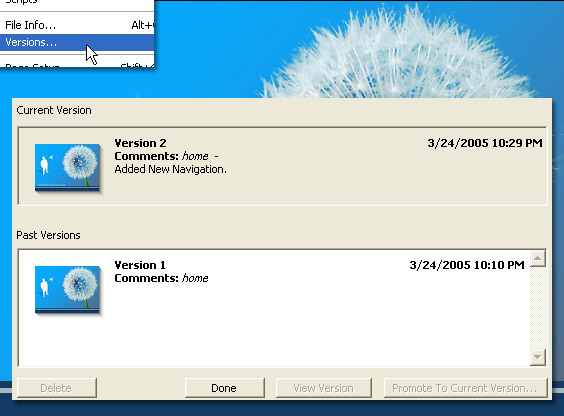
Certainly a great feature for dealing with multiple change requests from clients (like I do) before final design approval and not have to go through the process of toggling layers, layer sets or layer comps.
To learn more about further streamling File Version with multiple users, across Networks and advanced Admistrative control consult your Help manual.