Here’s simple star bust gradient text effect using just the ‘Stroke’ style from the ‘Blending Options’.
For this example I chose a Handwriting Font just to reveal the curves a little more.

-
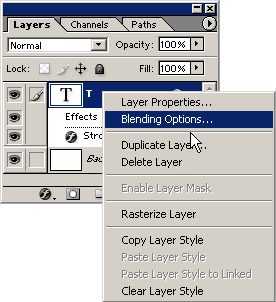
In the ‘Layers Palette’ Right Click/Control Click on the font layer, and from the context menu, choose ‘Blending Modes’.
-
At the Blending Modes apply the ‘Stroke’ settings that I have captured below.
The thing to note here, is the ‘Fill Type’. I used ‘Gradient, with ‘Star Burst’ style. This will allow the gradient to follow the direction of the stroke, as opposed to a just flat Linear direction.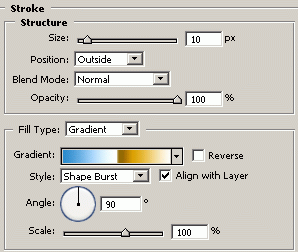
This is how it looks once I applied the ‘Stroke’ blending style.

-
Now back in the ‘Layers Palette’, drag the ‘Fill’ slider to the 0% and all that remains is the Stroke Effect.
Nothing overly fancy, but just to make you aware of the ‘Gradient/Star Burst Style’, thats often overlooked.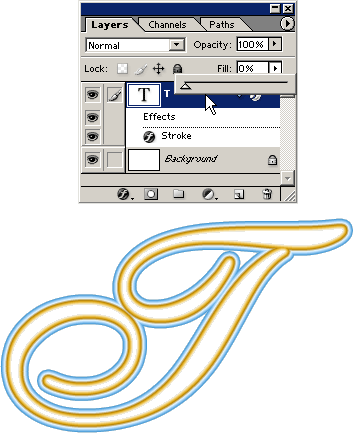
Here’s another variation.
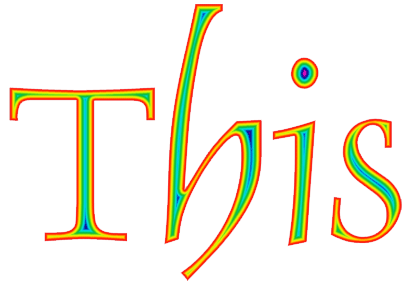
And also works great on shapes and complex shapes.