Here’s a simple ‘Layer Mask’ and Brush Preset technique to create a custom edge stamp effect.
With Photoshop started go to the File > New menu command option and create a New Document preset size of your choice. I opted for 400×250 with Background contents set to a shade of grey (#89888a).
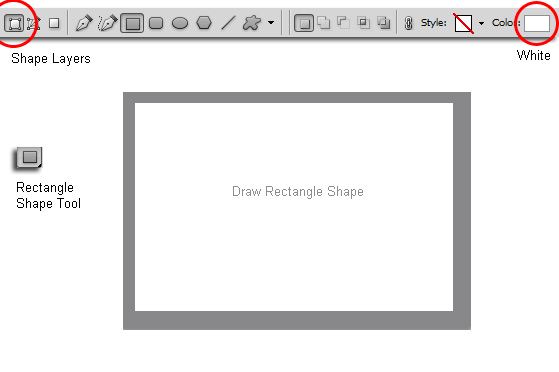
- Start with the ‘Rectangle Shape Tool (U)’ from the toolbar. Then on the Options Bar enable Shape Layers and set it’s color to White. Once configured draw (click and drag) a rectangle shape within your document as I have captured below.
Tip: Hold the Shift key to contstrain width and height while drawing the rectangle shape.
- Now that the vector shape is in place, lets create a Brush Preset that will define the knockout holes along the edge of a stamp shape.
To do this, select the ‘Brush Tool (B)’ on the ToolBar.
Then select the ‘Brush Preset Picker’ up on the Options Bar. Then hit the ‘F5’ key to open the Brush Preset Control Panel and at the Brush Tip Shape pane window adjust the Size and Spacing as captured below.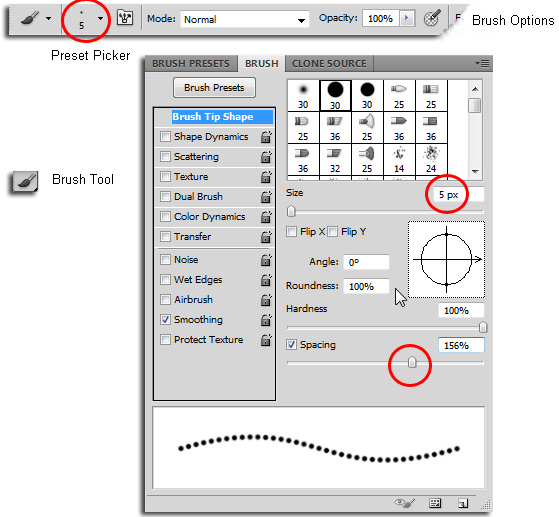
Note: For variations on edge knockouts adjust the above size and spacing as desired.
-
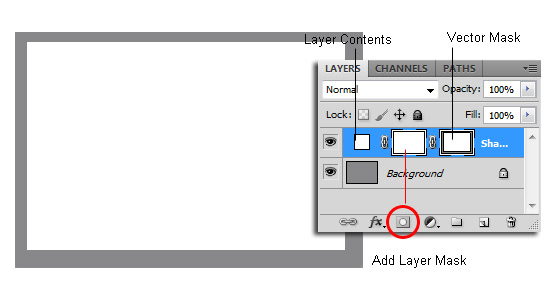
We now have the base ‘stamp’ rectangle shape and the edge preset defined. We now need to append a Layer mask to the base rectangle.
With the base shape Layer active (Shape 1), click the Add Layer Mask’ icon command located at teh bottom of the Layers Panel. A new Layer Mask thumbnail will be appended between the Layer contents and the vector mask as captured below.
-
We’re almost there!
Press the D Key to reset the foreground swatch color to Black.
Click on the Shape 1 Layer Mask thumbnail to select/activate it.
Then activate the ‘Path Selection Tool (A)’ and select the edge of the rectangle vector shape. To determine that the path is selected you should see an outline with four corner anchors as I have captured below.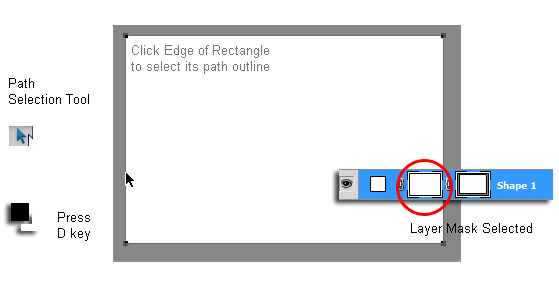
-
Then Righ Click/Option Click directly on the vector path outline and from the context menu options choose Stroke Path. Choose the Brush Tool at the Stroke Path options prompt, then OK to apply the edge knockout to the Layer Mask.
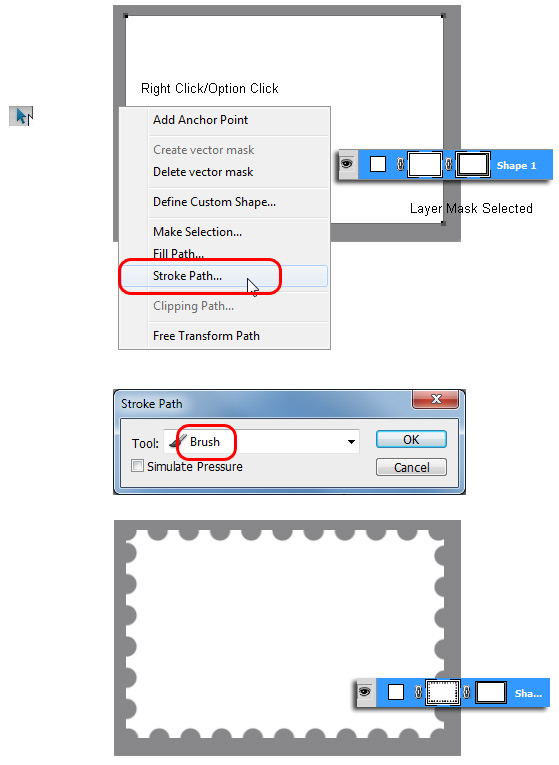
Wallah! The Brush Preset we created in step 2 does the trick here.
It’s just a matter of adding other elements to create the look and feel of a stamp. -
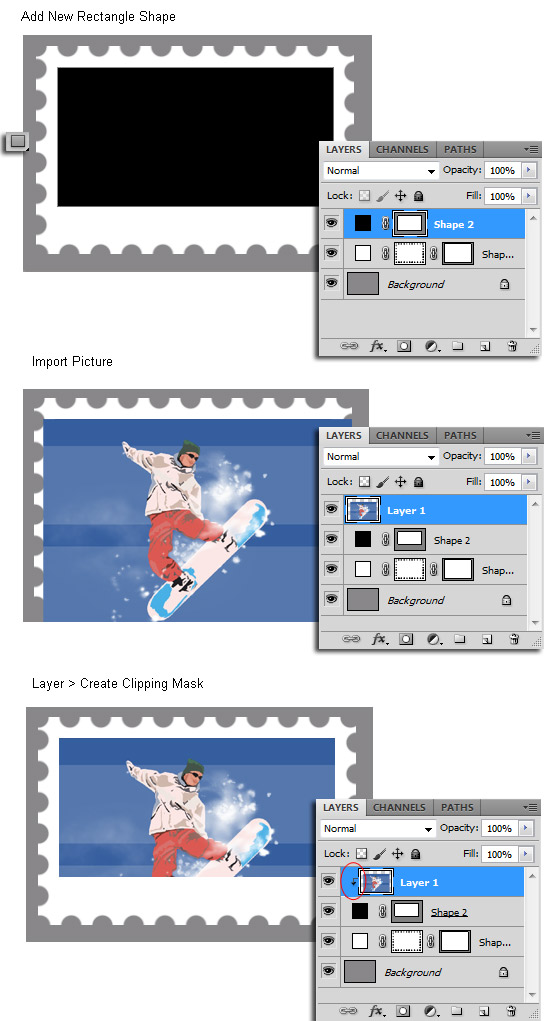
Now lets decorate the stamp.
With the Rectangle Tool, set to Shape Layers any color draw a rectanle as I have captured below (top). Ensure there is enough footer space to captioning.
Then choose either method of File > Place; drag and drop from Adobe Bridge or the native file system, or Copy and Paste from a web source to bring in a photo or artwork and position it over the previously created rectangle and as the topmost Layer in the Layers Panel stacking order, as captured below (middle).
Then with the newly added image or artwork Layer active in the Layers Panel go to the Layer > Create Clipping Mask menu command. As captured below, bottom, the image Layer (in my case Layer 1) will be clipped (masked) by the bounds of the Layer content below it, in our case Shape 2.
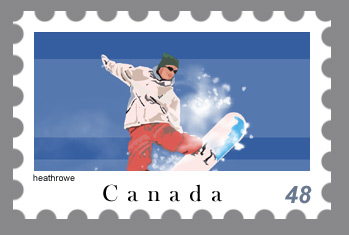
This is the final image with additional text captions.