Here’s a few simple steps to help create a retro-style text effect.
No need to duplicate and merge multiple layers, follow along and I’ll show you how it’s done.
Start with a new document. Preset option is entirely up to you. (I used 400×400)
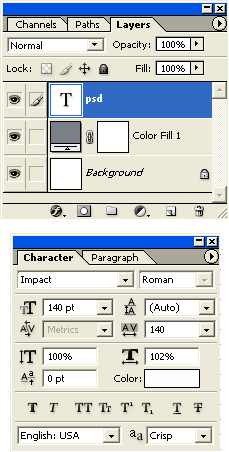
For contrast I added a new Color Fill Layer (#7A7F88), as indicated by the screen capture below.. (Optional)

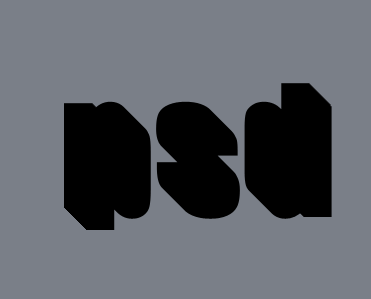
Next, add the Type Layer of your text and font choice. Make sure the font size is a large integer so that you can see the effect more efficiently. (I used the text ‘psd’ with font settings of ‘Impact’, ‘140 pt’, White, then opened the ‘Character Palette’ and set the tracking for the characters to ‘140’, to space them apart a bit.)
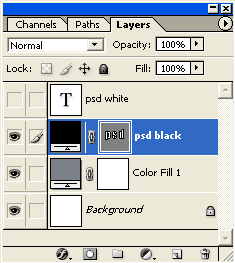
Next duplicate the .psd Type layer, change its color property to Black(#000000). Drag this new duplicate layer below the original in Layer Palette stacking order. (I also renamed my layers to something user friendly)
Use the Left & Up arrow keys to nudge the duplicate type layer’s position to the upper left of the original. (As I have captured below)
Note: All type setting are enirely up to your preference.
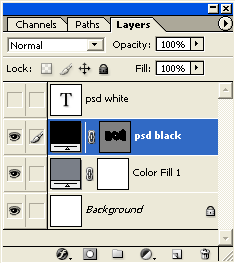
Here is what the Layers Palette looks like. (Note: I renamed mine)
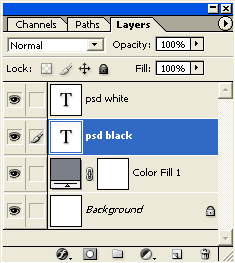
Next, hide the original type layer by clicking the eye symbol in the Layers Palette, and keep the duplicate type layer active. (In my case .psd black)
With the duplicate layer active, go to ‘Layer/Type/Convert to Shape’ menu option, to turn the type layer into a vector color filled shape.
Note: This type is no longer edit able text.
Next, select the ‘Path Selection Tool (A) ![]() on the Toolbar and begin a click & drag action from the upper left downward to the lower right, as I have captured below. This will select all individual character paths attached to this layer. (In this case p,s & d.)
on the Toolbar and begin a click & drag action from the upper left downward to the lower right, as I have captured below. This will select all individual character paths attached to this layer. (In this case p,s & d.)
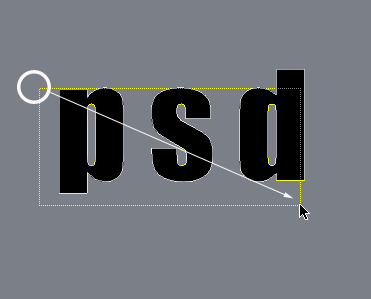
As indicated by the path outlines below, all items are selected.
Alternatively: You can select them by Shift + clicking on the individual characters with the ‘Path Selection Tool (A)’ active.
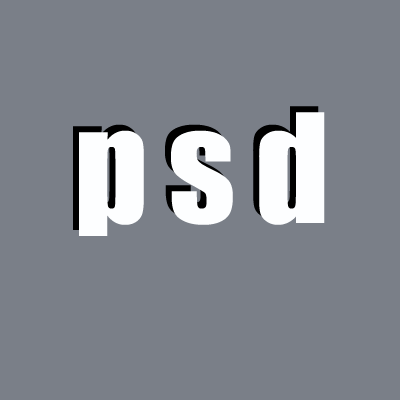
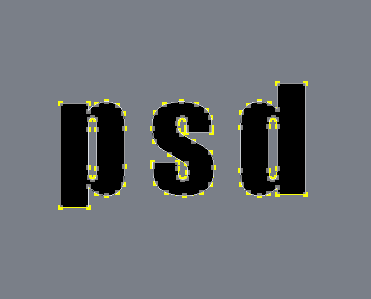
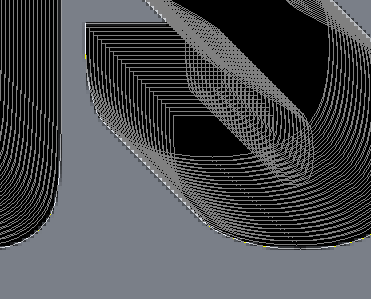
Finally, to create the perspective on these characters in one swoop without having to duplicate and merge, Hold the Alt key (Mac: Option key) and repeatedly nudge with combinations of the Down Arrow Key then the Right Arrow Key.
At first glance, ti dosn’t look too pretty. (As captured below)
Just hit the ‘Enter/Return’ key or Ctrl + H (Mac: Command + H) to hide the path outlines, as captured below.
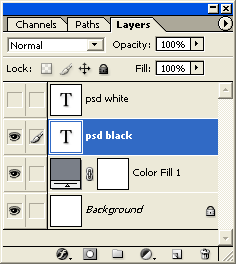
Explaination: What happened here? Holding the Alt key (Mac: Option key) in the above process actually duplicates all the selected path elements on next move. That next move was applied with the repeated Down & Right Arrow key combinations. And if you notice in the Layers Palette, it all occured on the same active Layer. (As captured below)
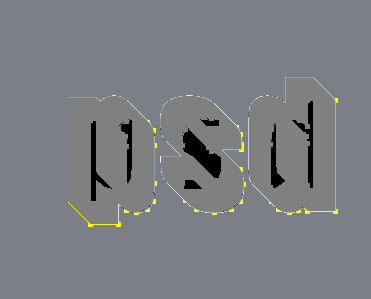
However, there are still duplicate vector fills in there. For every one Alt + nudge combination made duplicated the original just one (1) pixel. To show you, with the ‘Path Selection Tool (A)’ still active, and Zoom inward to have a closer look. The below capture shows you the duplicates in detail.
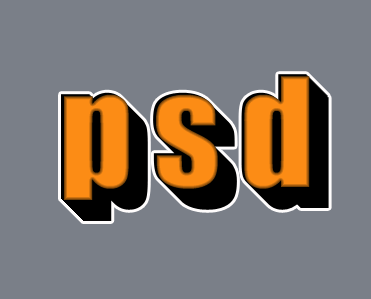
The remaining steps require to turn on visibility of the original .psd white type Layer. Then apply a stroke outline (Size:3, Position:Outside,Fill Type: Color with #ffffff) to the psd black layer as I have captured below. I additionally altered the color to an orange (#FC8C15) to the original psd white layer.
Summary:
1. Two Type Layers. One for the base, the other for the shadow effect.
2. Convert the shadow layer from Type to Shape.
3. Select all Shape elements.
4. Apply Alt + Down Arrow key (then Right Arrow key) repeat transformations.
5. Apply additional layer styles.