What you will need to begin is a high resolution image. (Not supplied – below is just a sample of what I used for this effect.)
Note: Image courtesy of AbsolutVision Photo Gallery.
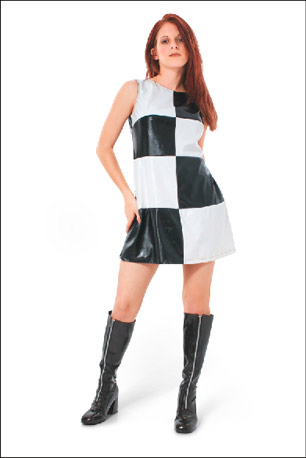
The above image is a nice one in and of itself, but what I would like to focus on is just a portion of the face.
So I zoomed and cropped a portion, as captured below. Duplicate the original, to work on.
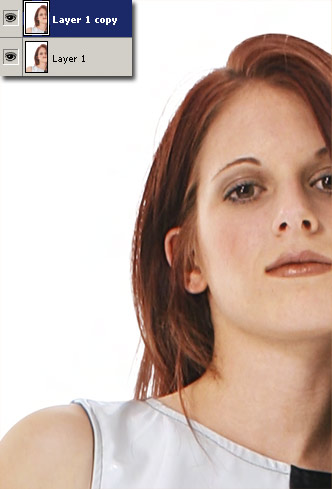
- With the above captured ‘Layer 1 copy’ selected:
Go to the ‘Filter/Artistic/Cutout’ menu command.
The idea is to simply isolate the photography feel from the picture and using desirable ‘Cutout’ preferences to create solid colors at the same time retaining a striking pose.
Note: Depending on your choice of image and resolution, your Cutout Preferences will vary from mine.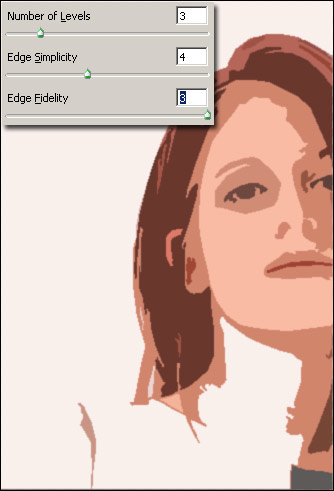
-
Next lets add a prism of color with a simple Gradient Fill Adjustment Layer:
A. Select the ‘New Fill/Adjustment Layer’ icon and from the list choose ‘Gradient Fill..’.
B. In the ‘Gradient Fill Dialog’ click your current Gradient Preset picker to open the ‘Gradient Editor’ and from the default preset list select the ‘Transparent Rainbow’ preset.
Hint: Mouse Over the Gradients and it’s name will appear as a tool tip description.
Set the remaining desirable Gradient properties as I have captured, then click OK to commit the Gradient Fill changes. C. The Gradient Fill now has it’s own layer.
D. Set that new Gradient Fill layer Blending Mode to ‘Overlay’.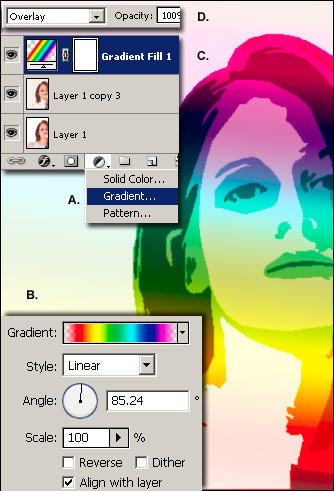
-
Next select painting tool and Brush Tip:
A. Create a new Empty layer directly above the previously created ‘Gradient Fill 1’ Layer, as captured below.
B. Select the ‘Smudge Tool (R)’ from the Tool Bar
C. On the Options Bar select a wet edge brush tip preset. I used ‘Oil Medium Wet Flow’ as captured below.
D. Still on the Options Bar, set this brush parameters to ‘Normal’ mode, a low ‘Strength for Stroke’ integer and ensure ‘Sample All Layers’ is ticked.
Note: Ultimately, you choose a Brush Tip that simulates your desired effect.
-
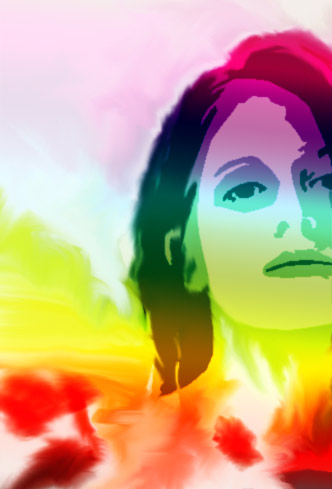
Finally with the above settings, click and drag in short motion strokes around any desired areas.
In my example below, I quickly worked on all the outer edges. (Image right, below)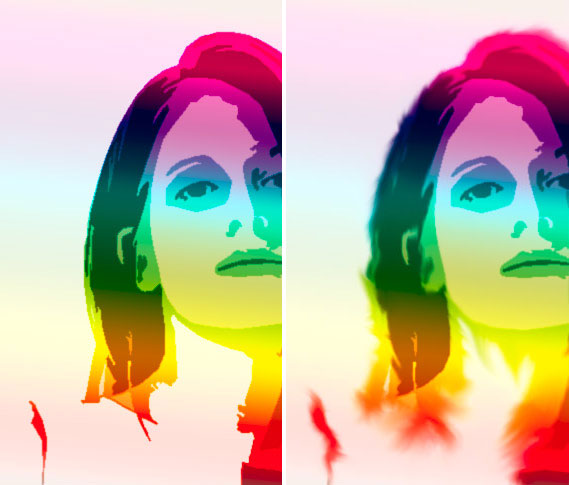
A complex examples, but nothing more than re-applying the motion strokes described above, except alternate the ‘Strength For Stroke’ integer.