Here’s a detailed look at how to achieve the Polaroid Effect.
Some basic shapes, a photo and some ‘Pen Tool’ manipulation which help achieve this.
So follow along to see how.
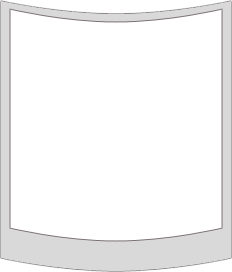
1. In a new document, foreground color #D9D9D9 then select the ‘Rectangle Shape Tool’ and draw in a shape as I have captured below.
Make sure there’s enough room around your document for rotation and distortion

2. With the ‘Rectangle Shape Tool’ still selected, go to the ‘Options Bar’ and choose ‘Subtract from shape area(-)’ option, then draw in another rectangle as I have captured below. Note: The White that you see below is the background Layer, thus a knockout affect created by ‘Subtract from Shape’ technique.

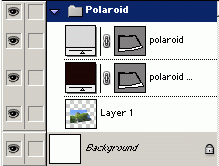
3. Here’s what the ‘Layer’s Palette’ looks like.
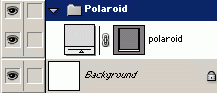
Note: Use of the ‘Shape Tool’ as we did here, and then a ‘Subtract from Shape Area’, creates a Layer with a double ‘Thumbnail Preview’ separated by a ‘Link Chain Icon’. The left thumbnail represents the ‘Layer Thumbnail’, and the right one is a ‘Vector Mask Thumbnail’.
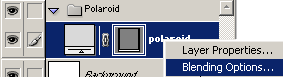
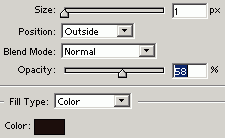
4. Next, select the polaroid layer, right-click and choose ‘Blending Options’.
5. Then I added these ‘Stroke’ options.
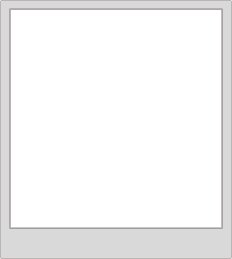
6. This is what it looks like thus far.
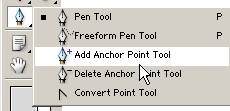
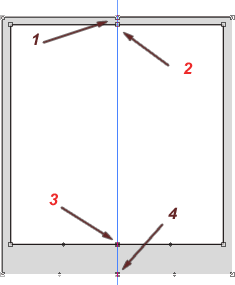
7. Next, with the polaroid shape layer selected, drag a guide to the center of the shape. Then choose the ‘Add Anchor Point Tool’ and add four more points to the shape as I have captured below.
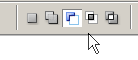
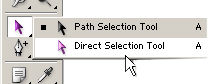
8. Then choose the ‘Direct Selection Tool’ on the ‘Toolbar’.
9. Then, click & drag a selection to cover those four new anchor points. (Indicated by the light grey box)
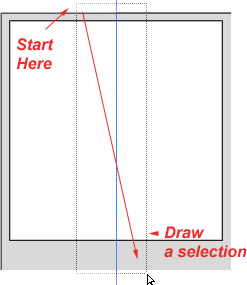
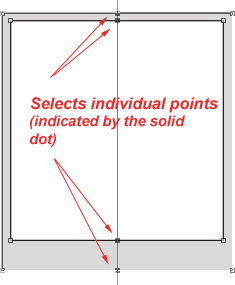
10. This will select just those four anchor points. (Indicated by the solid dots. As oppsoed to the hollow exterior ones – which remain unselected at this point))
11. With the ‘Direct Selection Tool’ still active, drag the upper most solid anchor point along the guide to a new position (in my case, downward) that your happy with. ( Note: All four soild anchor points should move!)
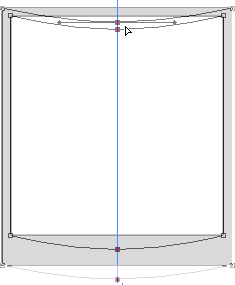
12. Here’s how mine looks like so far.
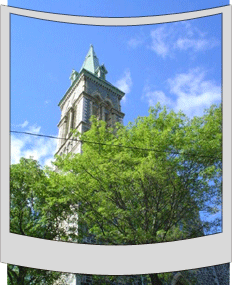
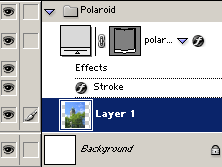
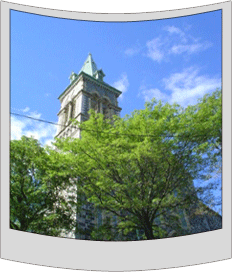
13. Next, on a new layer add a photo that will be the subject of the polaroid shot. (Just below the ‘polaroid layer, in the layer stack)
Notice how the image pears throught the polaroid layer that we applied the ‘Subtract from Shape Layer Area’ earlier!
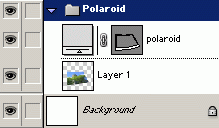
14. Here’s how the ‘Layers Palette’ should look like so far. Note: the stacking order!
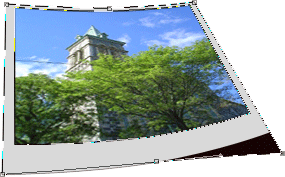
15. Next, we need to apply the curvature to the photo as we did to the shape layer.
For this we will use ‘Shear’ filter.
So, with the photo layer selected in the ‘Layers Palette’, go to ‘Edit/Transform/Rotate 90 CW as I have captured below.
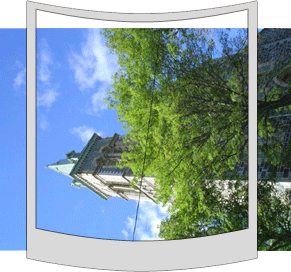
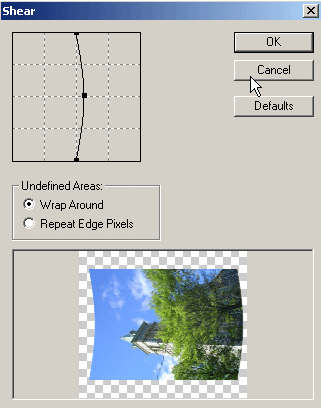
16. Then, go ‘Filter/Distort/Shear’ and apply the settings as I have captured below, then hit OK.
17. Then rotate the photo layer to its original state and use ‘Ctrl+T’ /’Distort’ to position the photo down to size that your most comfortable with.
18. Next, select the Polaroid Set.
19. Then, ‘Ctrl+T’ to transform into a postion that your happy with.
20. Now lets add a drop shadow layer by duplicating the ‘polaroid’ layer, change its foreground color to black and postion it as I have captured below.
Next, select the new ‘polaroid copy’ layer. Choose the ‘Direct Selection Tool’ from the toolbar and position the lower right anchor point as I have captured below.
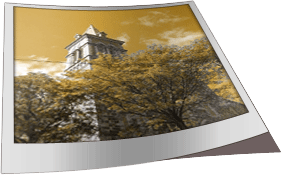
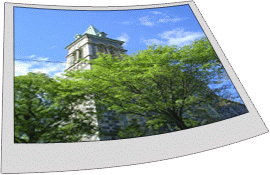
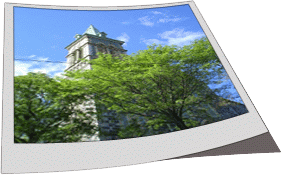
21. Here’s the final result.
Here’s a variation with added effects.(Layer Style/Blending Mode/Gradients)
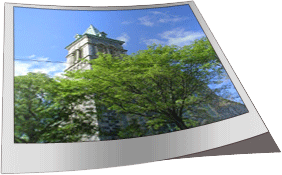
Here’s a variation with added effects.(Layer Style/Blending Mode/Gradients/Color Overlay/Satin)