- Using Pen Tool with Paths

This basically creates an Outlined Work Path, with no color fill and no layer attributes..
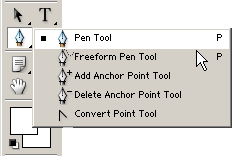
Select the Pen Tool and start adding Anchor Points as I have captured.

- I’ve connected the Anchor Points to create a Rectangle Shape.
Remember this Outlined Work Path is edit able at anytime, meaning as long as the Anchor Points remain, I can use the ‘Add Anchor Point Tool, Delete Anchor Point Tool or Convert Point Tool’ to redefine the Shape the way I see fit.
Helpful Tips: Easy Selections
*Hold the Control Key and Click the Rectangle Shape to auto select.*
 Use the ‘Direct Selection Tool (A)’ to select it.
*Or turn on Photoshop’s ‘Auto Select’ Feature.

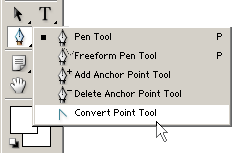
- Let’s use the ‘Convert Anchor Point’ Tool.
Click & Drag on the third (#3) Anchor Point that was created in the Outline, in the direction of the arrow.Switch to the ‘Pen Tool’ again and add Anchors 5,6,7 on the Edge of the Outline Work Path.
I’ll avoid the details here as most of the same principles apply from ‘Shape Layers’ as here.
Go there now for details..
- Once you’ve done that, as mentioned before, theres just an Outline Work Path. Go to the Path tab on the Layers palette and you will now see the New Work Path.

- Path Options
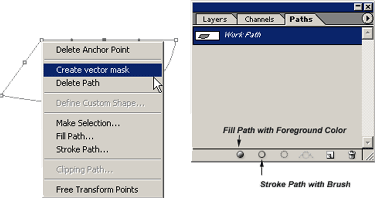
Now with any of the three (Pen Tool, Shape Tool, or Direct Selection Tool) tools selected, right click on the Work Path to see what options are available.On right Click:
Delete Anchor Point
Create Vector Mask
Delete Path
Make Selection
Fill Path
Stroke Path ****
Free Transform PointsPaths Tab Palette
Fill Path with Foreground Color
Stroke Path with Brush**** For this exercise, I will only focus on some ‘Stroke Path’ Techniques.
- ‘Stroke Path’
Right Click and choose ‘Stroke Path’. You will get this dialog box.You can choose from the various Tools but I will use the Brush Tool for now.
Choosing any one of these options will format your Work Path to whatever setting are set for that particular tool.Select the Brush Tool & Choose OK.

- ‘Stroke Path Continued’
The Brush Stoke is now applied to the Work Path. Right clicl on the Work Path and Choose delete or go to the Paths Tab on the Layers Palette and drag the Work Path in the Trash Can.It’s best to apply the Brush Stoke on a New Layer.
Brush Size – Master Diameter 1px

- ‘Stroke Path Continued’
Again on a new layer, with the Pen Tool click to create your Anchor Points, then use the Convert Point Tool to create some curves.
Then, right-click and choose Stroke Path, choose Brush.Nothing fancy, just getting you familiar with the routine. A sure benefit to use if you don’t want to use the Pencil Tool.

- ‘Stroke Path Continued’
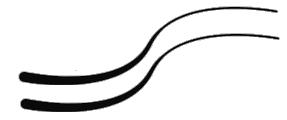
Again on a new layer, with the Pen Tool click to create your two Anchor Points, then use the Convert Point Tool to create a curve.
Then, right-click and choose Stroke Path, choose Brush.This time I changed the Brush Size – Master Diameter 5px

- ‘Stroke Path Continued’
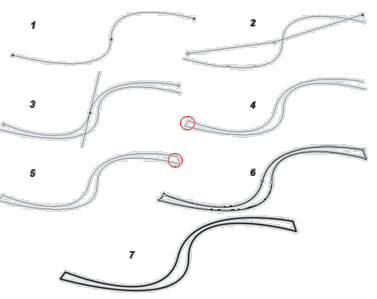
Combining Paths
1.Same as above. Pen Tool, Create Anchors, Convert Anchors.
Select the Direct Selection Tool and then select anywhere on your document but the Work Path.2 & 3.Start a new Path. Select Pen Tool, Create Anchors, Convert Anchors.
Select the Direct Selection Tool and then select anywhere on your document but the Work Path.4 & 5.Start new Paths to join the top and bottom portions.(Encircled in Red)
6.Select the Direct Selection Tool and select the newly combined Path, then right click, Stoke Path.
7.Right click on the Work Path, Delete Work Path.
- ‘Stroke Path Continued’
Try this option also:
Select the Direct Selection Tool and select the newly combined Path, then right click, Fill Path.Use Black, Opacity at 100% & Anti-aliased turned on.

- ‘Stroke Path Continued’
Try this option also:
Select the Pen Tool, create 3 Anchor Points, Convert Anchor Point 2 (middle) to curve the Path.
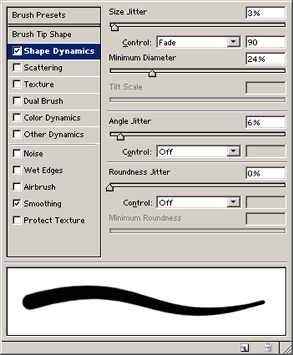
Before Applying the ‘Stroke Path’ option, Select the ‘Brush Tool’ & then the ‘Brush Docking Well’ tab
and apply the following two captured settings for the ‘Brush Tip Shape’ & ‘Brush Dynamics’.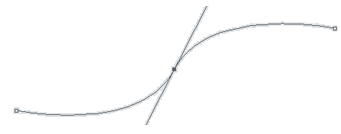
- ‘Stroke Path Continued’

- ‘Stroke Path Continued’
When the Brush Options are configured, then right-click on the ‘Work Path’, then choose ‘Stroke Path’. Right click again ‘Delete Work Path’.Endless opportunities here, with the right Brush Dynamics you could make some really nice Custom Shapes.
