
This basically creates a Vector Color Filled Shape based on the foreground color of your choice and the Anchor Points you define to create your Shape.
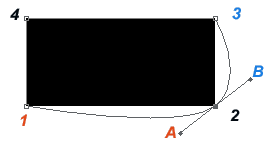
I started with an Anchor Point at 1 and worked my way to around to connect back to 1 again. 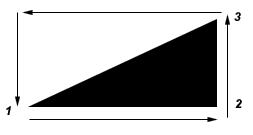
Helpful Tips: Easy Selections
*Hold the Control Key and Click the Rectangle Shape to auto select.
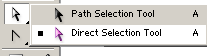
*  Use the ‘Direct Selection Tool (A)’ to select it.
*Or turn on Photoshop’s ‘Auto Select’ Feature. 


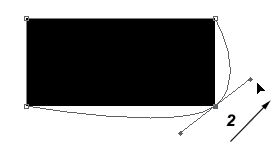
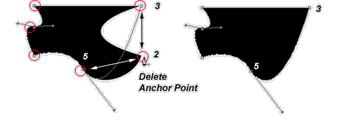
Click & Drag on the second (#2) Anchor Point that was created in the Shape in the direction of the arrow.
So ‘A’ controls the curvature between Anchors 2 and 1.
Likewise, ‘B’ controls the curvature between Anchors 2 and 3.
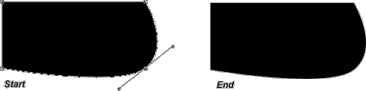
With the Direct Selection Tool selected, click on the ‘A’ End Anchor Point and drag in the direction of the arrow that I have shown. Then, go ahead and click on the ‘B’ End Anchor Point and move in the direction of the arrow I have shown.
The End picture shows the results.
Helpful Hint:
To move the entire Shape use the ‘Path Selection’ Tool as in the above image. 

Select the ‘Add Anchor Point Tool’ and click once in the Area that I have done(Red arrow indicator and labeled 5). A new (A & B) End Anchor Points appear. Switch to the ‘Convert Anchor Point Tool’ and drag in the directions of the red arrows.

The more you practice the quicker you’ll apprehend the geometry behind the the Pen Tool. 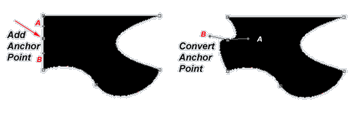
(Anchor 5 was created in step #9 above.)
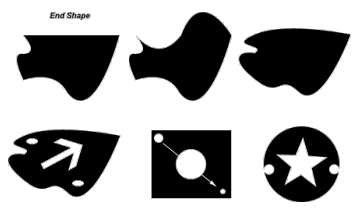
The others are deviant examples of the ‘End Shape’ and quick examples using the ‘Pen Tool’.