| . Here’s a neat way to add a logo of sorts to a T-shirt that already has creases or wrinkles.
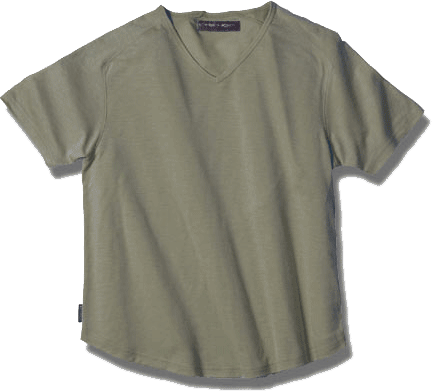
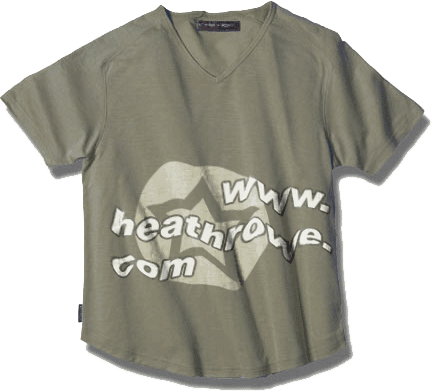
Below is the starting graphic that will be the base layer of this tutorial. |
|
|
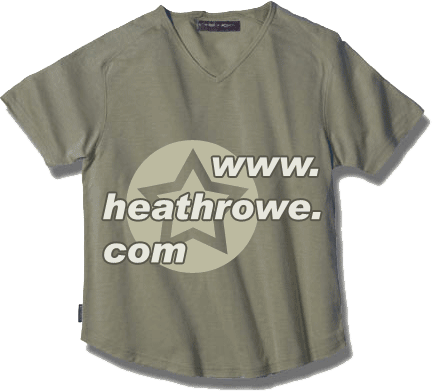
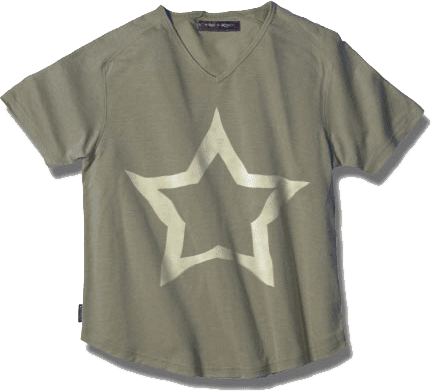
| 2. Next is an added simple logo graphic that will be the target of the ‘Liquify Tool’ effect. The challenge here is to blend the flat logo into the creases of the shirt. Stick around and follow along, and I’ll show you how to seemingly make this happen! |
|
|
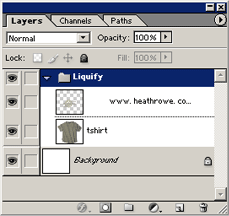
| 4. The left screen shot below is the initial stage of this tutorial. Basically, the two individual layers inside a Layer Set, with the target layer (the logo)stacked above the base layer (t-shirt).
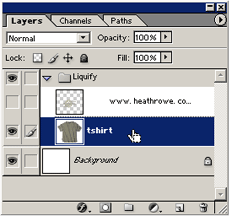
To begin this tutorial, as I have captured in the below right graphic, hide the target layer(logo) and select the base layer(t-shirt). |
|
|
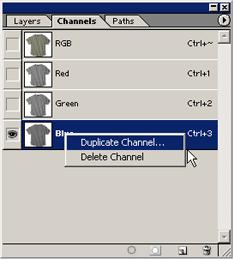
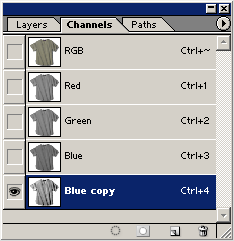
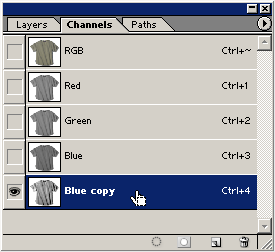
| 5. Next go to the ‘Channels’ tab (second one) in the ‘Layers Palette’. Duplicate the channel that has the best contrast, in this case the blue channel, to create the ‘Blue copy’ channel..
TIP: Duplicate a channel either by right click, choose ‘Duplicate Channel’ or by dragging that ‘Blue Channel’ and dropping it onto the ‘Create New Channel’ button on the bottom of the Channels Palette.(Second from right). |
|
|
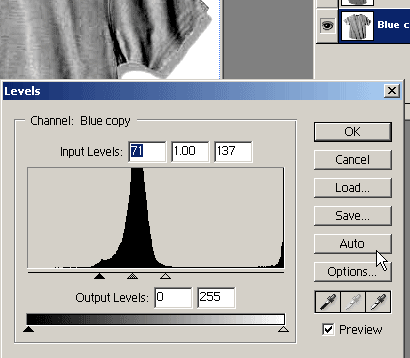
| 6.Next, let’s draw out some more contrast from this channel by using the ‘Levels Adjustment’. (Ctrl +L keyboard short cut or alternately, ‘Image/Adjustments/Levels’ from the top menu command options.)
Basically, all I did was adjust the sliders to the center to enhance the contrast. Then hit the ‘OK’ button when your content with how it looks. Note: A similar effect can be done by using the ‘Curves Adjustment’ option also. |
|
|
| 7.Now, go back to the ‘Layers Palette’ and reselect the target layer (logo). |
|
|
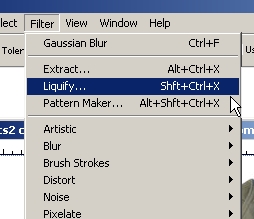
| 8.Then Shift + Ctrl + X to bring up the ‘Liquify Tool’. |
|
|
| 9. Click here for a screen shot.
Pay attention to all the areas that I have a red star next to. Liquify Tool Tips: This tool allows for a number of keyboard short cuts. |
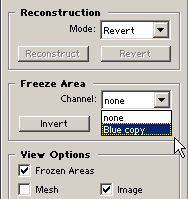
| 10. By far the most important area in this case is the ‘Freeze Area’. Though there is a separate ‘Freeze (F)’ tool available, we will be using the ‘Channel’ that we created earlier. Go ahead and select it from the drop down list. |
|
|
| 11. Click here for a screen shot.
Your looking at a freeze ‘mask’ area using the reference ‘Blue copy’ channel. |
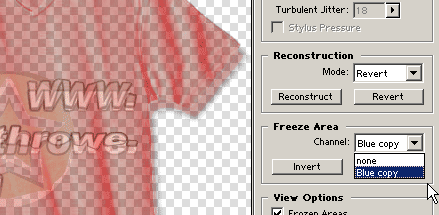
| 12. Click here for a screen shot.
Next select the ‘Shift Pixels Tool (S)’, and from the top area of the target (logo) click and drag in a horizontal line from left to right, then stop. Based on your chosen Brush Size and Pressure, I had to do this 3 times. ( yours may vary). |
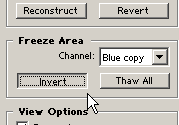
| 13. Once you’ve did that, go to the ‘Freeze Area’ again and select the ‘Invert’ command button option, and again select the ‘Blue Copy’ from the ‘Channel’ drop down list. |
|
|
| 14. Click here for a screen shot.
Still using the ‘Shift Pixels Tool (S)’, and from the top area of the target (logo) click and drag in a horizontal line from right to left, then stop. Based on your chosen Brush Size and Pressure, I had to do this 3 times. ( yours may vary). Once you’ve stroked the target layer from left to right, invert, right to left in this fashion, hit the ‘OK’ command option to exit the ‘Liquify Tool’. |
| 15. Now this is what it looks like so far. Note, I did not get this correct the first time. You will have to do this a few times to get a somewhat accurate liquid motion affect to resemble the movement of the creases in the shirt. |
|
|
| 16. Again as in Step 4, hide the target layer (logo) and select the base layer (t-shirt). |
|
|
| 17. Go back to the ‘Channels Palette’, and Select the ‘Blue copy’ channel. |
|
|
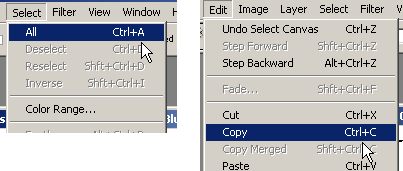
| 18. Next go to ‘Select/All’ (Ctrl +A), then ‘Edit/Copy’ (Ctrl + C) to copy all the contents of the ‘Blue copy’ channel as a selection. |
|
|
| 19. Then, go back to the ‘Layers Pallet’ and reselect the target (logo) layer. |
|
|
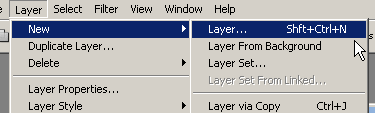
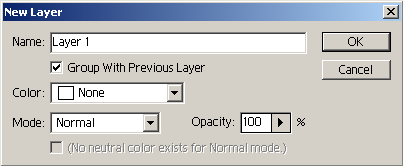
| 20. Next create a new empty layer ‘Shift + Ctrl + N’ and in the ‘New Layer’ dialogue box that follows, tick the ‘Group with Previous Layer’ option. |
|
|
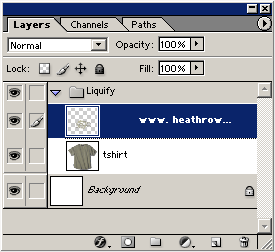
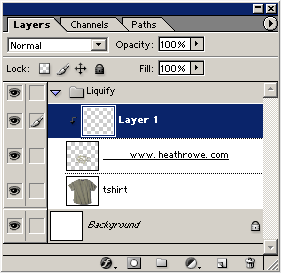
| 21. This is what the ‘Layers Palette’ should look like now with the new empty grouped layer, stacked above and indented with the target layer (logo). |
|
|
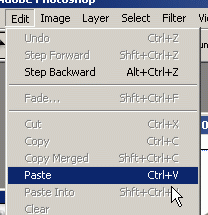
| 22. Now, ‘Edit/Paste’ the ‘Blue copy’ channel (from step 18) into this layer. Alternately, Ctrl + V keyboard shortcut works also. |
|
|
| 23. Here’s how it looks, so far. As you can see the contrast (what I was highlighting in Step 6) blends nicely with the actual folds into the t-shirt. Now we need to bring back the color of the target layer (logo) without losing this nice blend. |
|
|
| 24. To bring back the color, have the target layer (grouped layer) selected, and from the ‘Layer’s Blending Mode List’ choose one that best does this. I used ‘Hard Light’ to give me the final result as shown below. But in fact, any one of the ‘Soft/Hard/Vivid/Linear/Pin Light’ modes gives interesting results. If desired reduced the Opacity of this layer just enough to eliminate some of the harshness in the folds. |
|
|
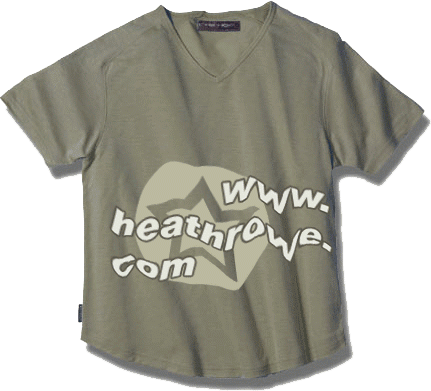
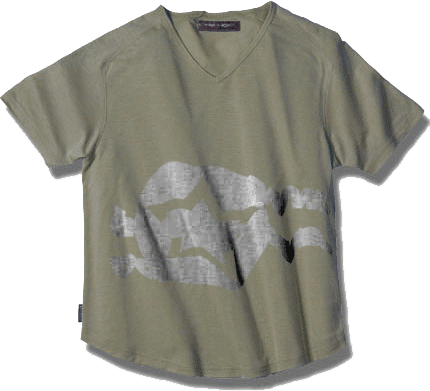
| 25. The final image. |
|
Here are some other samples using this technique.
|