| 1. To begin this Pattern tutorial, select the ‘Polygon Tool’ from the toolbar.
Select the ‘D‘ key on your keyboard to set the foreground color to black.(or select your preferred color) |
|
|
|
|
| 2. Once you’ve selected the ‘Polygon Tool’, notice the new Polygon Options available up on the ‘Options Bar’.
The default ‘Sides’ integer is 5. Lets change this to 6, to create the right shape for the honeycomb. Then draw in a single Honeycomb Shape. (size and angle is up to you) |
|
|
|
|
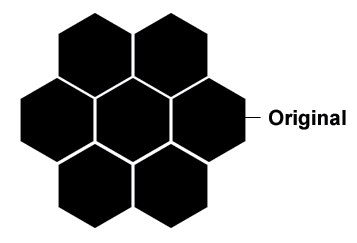
| 3. Now to create the right pattern, duplicate the original and place them side by side as I have captured. (TIP: Hold Alt Key + click & drag to duplicate) | |
|
|
|
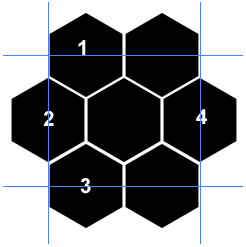
| 4. Heres the crunch of this pattern…
Drag Guides from the Ruler Bar as I have positioned them to the right. To position the guides accurately: Do the following… 1. Ctrl + click on the the layer I have labeled ‘1’. Then drag a Horizontal Guide from the Ruler Bar and drop it at the mid section of the object. (TIP:To find the exact half point of that particular object, SLOWLY DRAG THE GUIDE OVER THE OBJECT. You should notice three things. When the object is selected, the guide should automatically nudge lock to highest point of the object, and as you continue to drag the guide, it also automatically nudge locks to the middle point, and likewise the lowest point of the object. Didn’t get it!!! Try it again.. you’ll notice a little locking into place when you reach those three points.) 2. Repeat above process for the Object I have labelled ‘3’. 3. Repeat process for objects labelled ‘2’ & ‘4’, EXCEPT use Vertical guides from the Ruler Bar. |
|
|
|
|
|
|
|
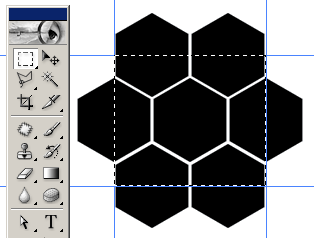
| 5. Now select the ‘Rectangular Marquee Tool (M)‘ , & then Ctrl + Shift + ;(Semicolon) to Turn on ‘Snap to Guides’. (Or similarly, go to ‘View,Snap’.)
Then Marquee (Select) the area inside the guides as I have captured. (The area that forms a perfect square.) |
|
|
|
|
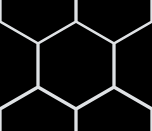
| 6. Then go to the Menu bar and ‘Image/Crop’.
You should now have what I have captured to the right. |
|
|
|
|
| 7. Next, Select the background layer in the ‘Layers Palette’.
Then go to the ‘Menu bar’ and choose ‘Edit/Define Pattern’ as I have captured. |
|
|
|
|
| 8.Give the new Pattern a name, like ‘HoneyComb’. | |
|
|
|
|
|
|
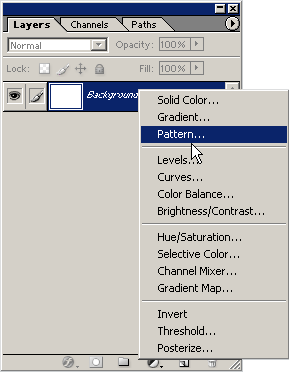
| 9.Now create a New Document (Ctrl + N Key), with the preferences of your choice.
Then choose the ‘Fill or Adjustments Layer Option’ on the bottom of the of the ‘Layers Palette’ (third from right) and choose ‘Pattern’ from the list as I have captured. |
|
|
|
|
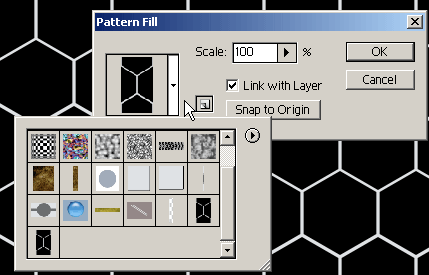
| 10. The ‘Pattern Fill’ dialogue box appears with the last created ‘Pattern’ selected and applied to your ‘Layer’.
If it’s not the Pattern you want then choose from the ‘Pattern Preset’ options box. Then select OK to confirm. |
|
|
|
|
|
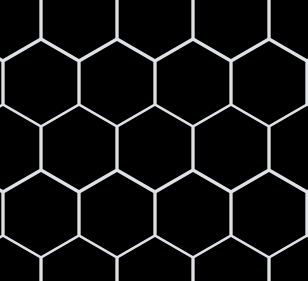
11. Here’s a cropped version of what the Pattern looks like.
|
|
|
|
|