A
quick guide load, ready to use, Custom Shape .csh files within Photoshop and ImageReady.
Go to the downloads page and select one of the Custom Shapes and follow along with this simple procedure.
Option One
-
Close Down Photoshop.
-
Download any one of the available Custom Shape files.
-
Uncompress the file to your Program FilesAdobeAdobe Photoshop XPresetsCustom Shapes folder (Adobe Photoshop X been your version of Photoshop)
-
Reload/Start Photoshop
-
Start a New Document
-
Select the Custom Shape Tool (U)
 from the Toolbar.
 -
From the Options Bar Select the Preset Picker (Encircled Red), then from the Preset Picker Panel select its menu command (Encircled Green), and from the list you should see the newly added Custom Shapes. (As captured below)
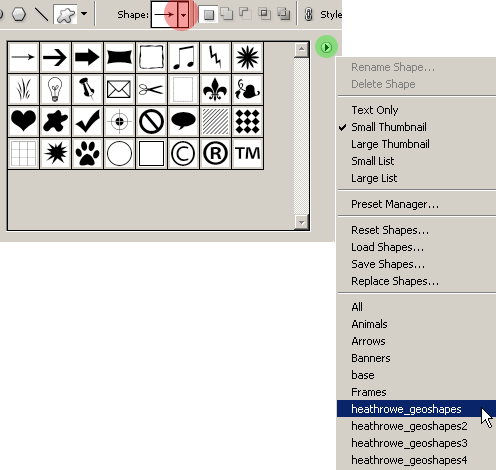
(Everytime Photoshop is started these newly added shapes will always be available.)
-
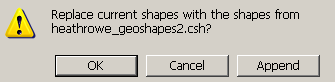
Selecting any of the newly added Custom Shapes, you will be prompted to replace the default list of shapes.
-
Clicking ‘OK’ populates the Custom Shape Preset list with just that newly selected list (bottom left),
while ‘Append’ adds the newly selected shape to the current list -In this case the default one. (bottom right)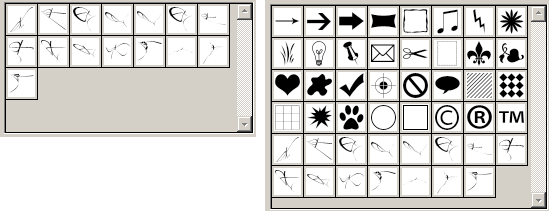
Option Two
-
Open Photoshop.
-
Download any one of the available Custom Shape files.
-
Uncompress the file to any preferred location on your hard drive.
(Dosn’t necessarily need to be in the Photoshop directory as outlined in Option 1/Step 3) -
Back to Photoshop and go ‘Edit/Preset Manager’.
-
Select Custom Shapes from ‘Preset Type’ drop down list.
-
Click the ‘Load’ menu command on the right of the Preset Manager dialog.
-
At the next ‘Load’ dialog prompt, locate the .csh file on your hard drive.
-
Click ‘Done’ command option to commit the changes.
-
Proceed to use the new Custom Shape picking up at Step 5 of Option One above.