Select the ‘Background Layer’ in the Layers Palette, then hit ‘Ctrl/Command + R’ to show the Ruler Bar’s (If not already visible).
Then drag a Horizontal and Vertical Guide from the Ruler Bar to meet at the center point of the new document.
TIP: Make sure ‘View/Snap’ is turned on. Then drag the guides SLOWLY and you will notice that the guide will automatically find the center point of the document. (Applies only to the background layer and individual layers)

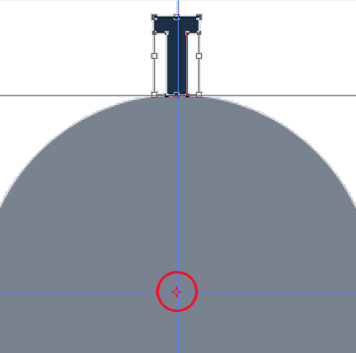
Then position that new Circle Shape layer to the centre of your document.
(Follow the TIP in step 1 to find the exact centre.)
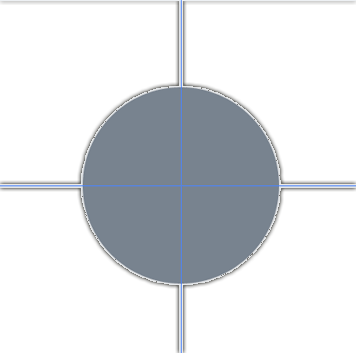
This should be on its own layer.
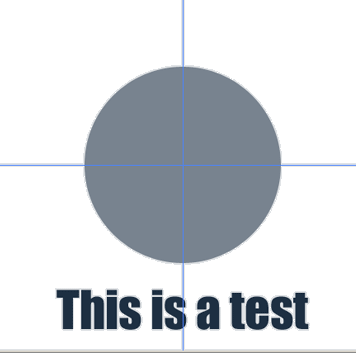
This will break up the text into individual letter shapes.
An alternative & tedious to this step is to create individual letter text layers.
The advantage of doing it this way is only a single layer is used for all of the individual text shapes.
The disadvantage is that the text is no longer editable. (As I have captured below)

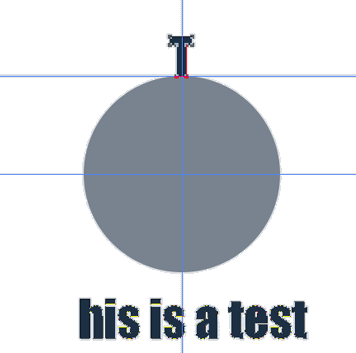
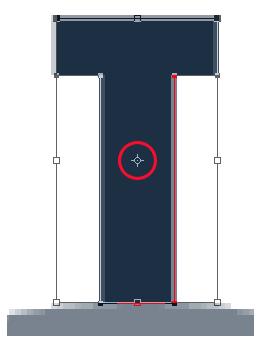
Then, select the ‘Path Select Tool (A)’ from the Toolbar. Click on the first letter (In this case ‘T’) and position it at upper most Horizonatal Guide and to the center of the Vertical Guide.
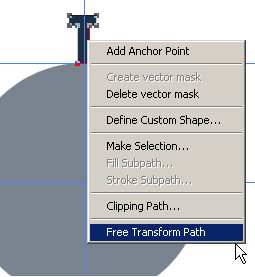
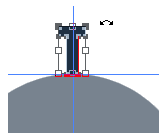
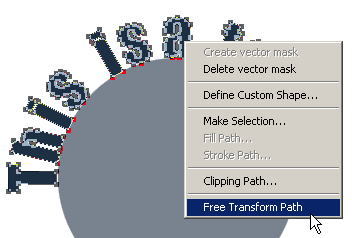
With the ‘Path Select Tool (A)’ still active on the Tool Bar, Right Click/Control Click on the ‘T’ letter shape and from the list choose ‘Free Transform Path’.
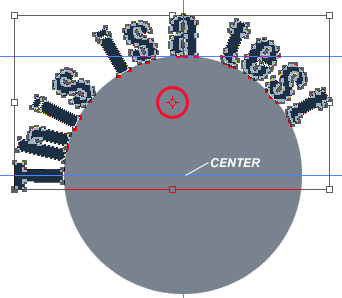
Besides the end anchor points, theres a center/focal point (circled in red & looks like a ‘Cross Hair’ symbol) which allows positioning of paths in relation to other objects.
TIP Right Click/Control Click again, and you will see the Transform options available.
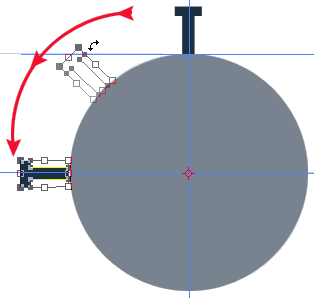
Alternatively, Right Click/Control Click on the ‘T’ shape and choose ‘Rotate’.

Do I have to start all over again? No!
We will apply the same trick to the whole phrase.
To do so, make sure the text shape layer is selected in the ‘Layers Palette’ and the ‘Path Seletion Tool (A)’ is active on the Tool Bar.
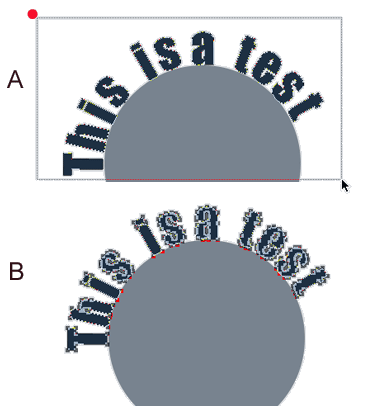
A. Start to click & drag (roughtly where I have the red dot) and end it until all the shape letters are inside the ‘Path Selection’ bounding area.
B. Now all the letters are selected.
Hope you enjoyed this tutorial.