1. Here’s a detailed look at how to achieve an Open Magazine Effect.
Some basic shapes, a photo, some ‘Pen Tool’ manipulation and the Liquify Tool helped achieve this.
So follow along to see how.
2. In a new document, set the foreground color #C1C3C0 (gray) & select the ‘Create New Fill’ icon  located at the bottom of the Layers Palette & from the list choose ‘Solid Color…’. This will create ‘Color Fill 1’ layer you see below.
Next, set the foreground color #ffffff (White) then select the ‘Rectangle Shape Tool’  , with ‘Shape Layer’
  active up on the Options Bar, then draw in a shape and give it a name by double clicking on the layer title/text. (I called mine ‘book’)
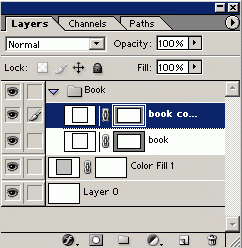
Then duplicate that layer as I have captured below so that its the upper most layer in the stack order. (Once duplicated it will default to the name of ‘book copy’.)
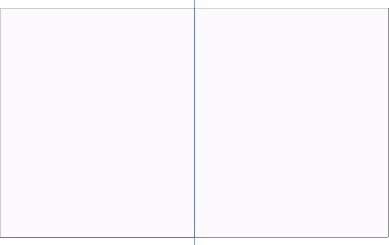
Hit ‘Ctrl + R’ (Mac: Command + R’) to toggle visibility of the Rulers’ Bar.
Then drag a vertical Guide from the left Ruler Bar to the center of the rectangle shape.
Make sure there’s enough room around your document for rotation and distortion
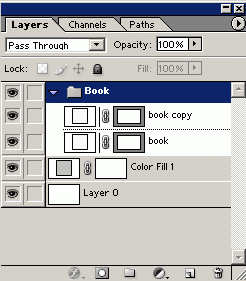
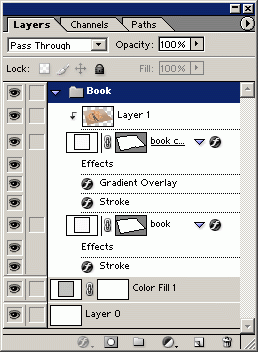
Here’s how the ‘Layers Palette’ should look.
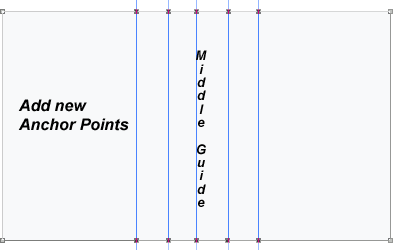
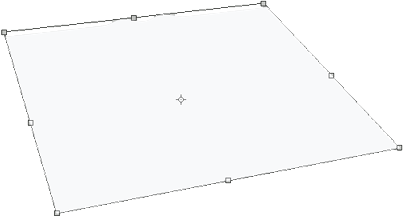
3. Next, with the upper most Shape Layer (‘book copy’) selected in the ‘Layer Palette’.
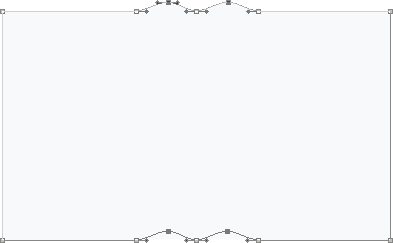
Then select the ‘Add Anchor Point Tool’ and add 10 addition anchor points as I have captured below. (Indicated by the solid anchor dots)
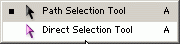
4. Next, select the ‘Direct Selection Tool’ from the ‘Toolbar’.
5. Then with the ‘Shift’ key pressed select the individual Anchor Points that I have encircled in red.
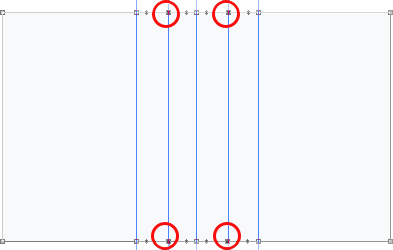
6. Still, with the ‘Direct Selection Tool’ active click and drag any one of those four Anchor Points upward as I have captured below. (Click and drag one should drag all four!)
7. Next, select the ‘Set labeled ‘Book’ from the ‘Layers Palette’.
8. Now hit the ‘Ctrl + T’ key combo to activate the Free Transform Handlers of the Set.
Then press and hold the Ctrl key again, then click and drag to reposition all four of the corner Anchor Points as I have captured below.
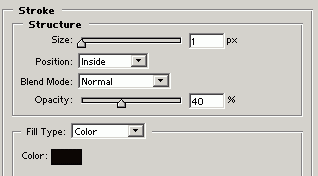
Next set a stroke for each of the ‘book’ and ‘book copy’ layers as I have captured below. (Using the same setting for each)
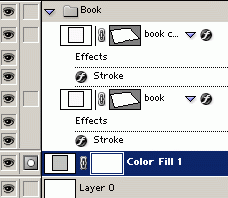
9. This is how the ‘Layers Palette’ should look now with the blending effects for each.
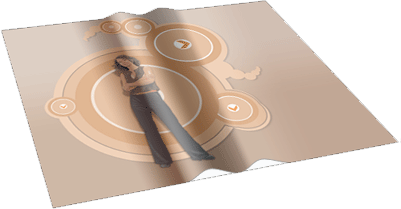
10. This is how the image should look thus far.
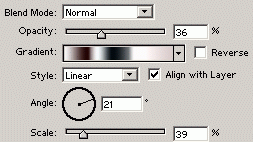
11. Set the ‘Gradient Blending Option’ as I have captured below for the ‘ book copy’ layer only.
12. Here’s the Custom Gradient Editor panel shot.

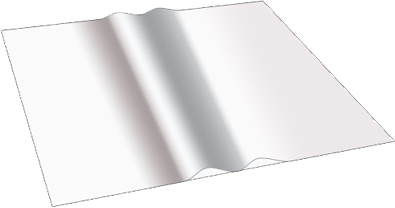
13. Here’s how mine looks like so far.
Note. Effects may vary. And if the gradient doesn’t match up with the folds then simple select the ‘Direct Selection Tool’ again and select an individual anchor point and hit the arrow keys to nudge in the proper direction. Repeat for any other misaligned anchor point.
15. Next, add an image on a new layer above the ‘book’ shape layers. Hit the ‘Ctrl+ T’ to transform/ right-click and choose ‘Distort’ and position it as you did with the ‘book’ shape layers earlier. Except, leave an overlapping edge.
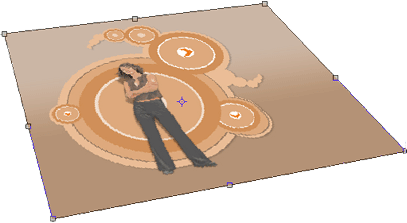
From this capture this is what I mean by overlapping.
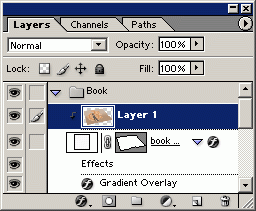
16. Now, select that new layer in the ‘ Layers Palette’.

17. Then hit ‘Ctrl + G’ to group with previous layer. There’s a new clipping group arrow icon in the ‘Layers Palette’.
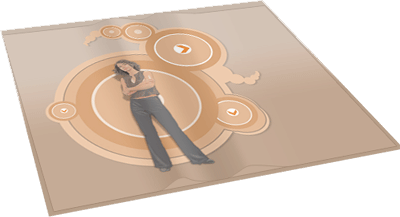
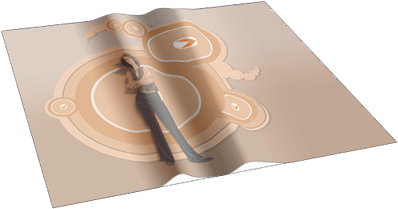
18. This is how the image looks thus far. The overlapping area was literally clipped and now the gradient effect is showing through.
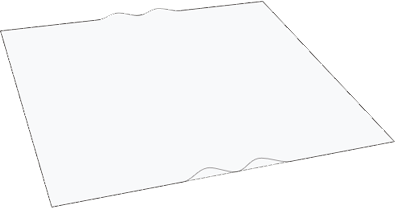
The image still appears flat and needs to be adjusted to the folds in the magazine. For this we’ll use the ‘Liquify Tool’.
19. With the image layer still active, ‘Shift +Ctrl +X’ to activate the ‘Liquify Tool’.
20. Click here for the ‘Liquify’ Instruction.
22. This is how it looks so far.
23. To bring back some of the color that was lost in the clipping group process, I duplicated the image layer 2 more times as I have captured below. (Screen Mode at Opacity of 43% and a Multiply Mode of 100%)
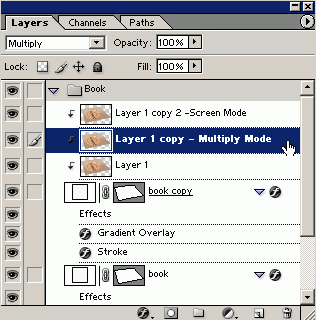
Here’s the enhanced color version.
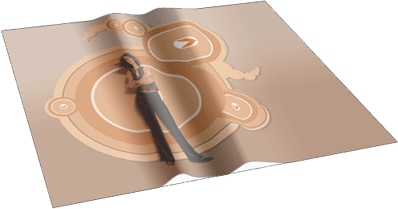
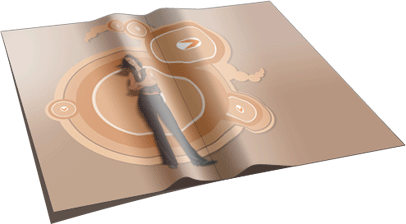
24. Here’s the final result. Added a few addition white shades with simple brush/blur combination at reduced opacity a drop shadow to the whole image and a center fold line.