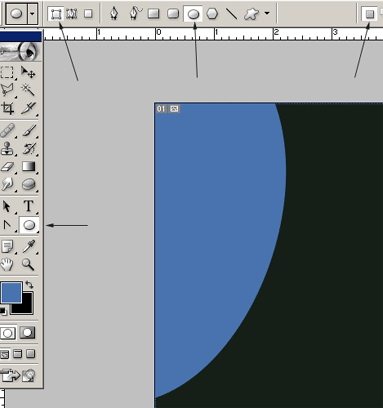
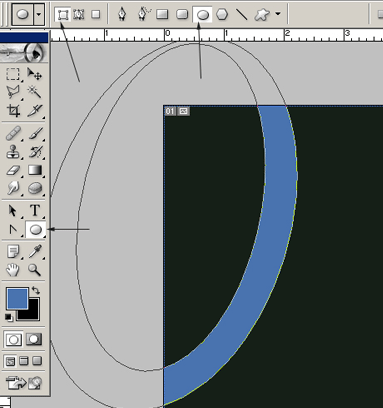
| . Start off with a Background Layer set to Black (#000000). Set the foreground color to the one of your choice, I used #4873AE for the main tube Shape. Now select the Ellipse Shape tool on the toolbar and draw in the shape as i have captured. Exact positioning/placement requires either ‘Path Selection or Direct Selection Tool’ on the toolbar to be selected, and then right click on the path, then choose ‘Free Transform Path. Right-click on the Free Transform bounding box and choose the Distort to position. Also, Pay attention to all the options the arrows are pointing to. |
 |
|
2. Repeat the above process with the Ellipse Tool, except make sure the ‘Subtract from Shape Area’ option is ticked.
Thats the one on the far right of what I have captured! As you can see, the basic Shape is now visible. (Again requires ‘Free Transform/Distort’ to position it into place as I have done!) |
 |
|
3. Go the Layers Palette, right click on the layer and choose ‘Blending Modes’ and select the options as I have captured below.
|
|
|
|
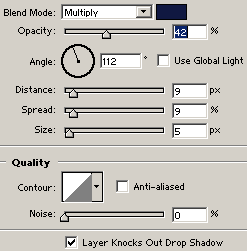
4. Drop Shadow Mode Options
Drop Shadow Color #101841 |
|
|
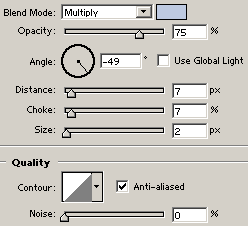
| 5. Inner Shadow Mode Options
Inner Shadow Color #BECAE1 |
|
|
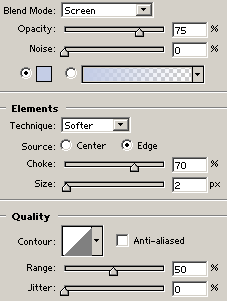
| 6. Inner Glow Mode Options
Inner Glow Color #C4CDE6 |
|
|
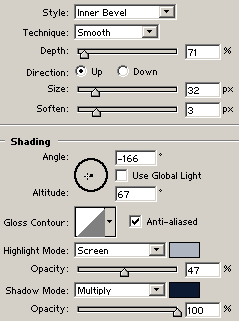
| 7. Bevel & Emboss Mode Options
Highlight Mode Color #B0B6C1 |
|
|
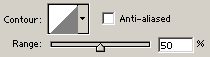
| 8. Contour Mode Options |
|
|
| 9. Satin Mode Options
Blend Mode Color #3C4252 |
|
|
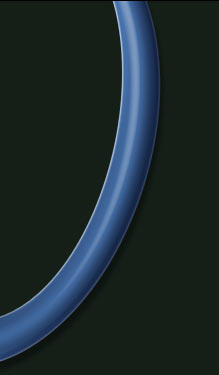
| 10. Here’s the final result. Variations of the above modes are entirely up to you. Explore to find out… |
|
|
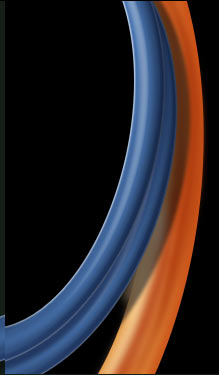
| 11. Here’s another variation. |
|
|