Here is a simple way to create small flash ticker animation.
Download the base (zipped) .psd file to get started with this tutorial.
Once downloaded and unzipped, open the ticker.psd file in Photoshop and observe the contents as I have captured in the layers palette screen shot below.
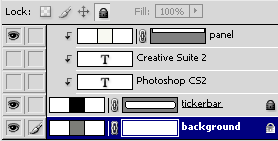
Note the following from the above capture:
1. All layers are Vector layer objects (Text + Vector Shape Layers)
2. The top 3 layers in the stack are ‘Clipped’ with the fourth layer.
3. Layer 2 and 3 from the top are hidden while the others are visible. This represents the initial animation state and will be altered later.
4. Layer 4 & 5 are locked. I tend to do this for ImageReady’s sake since I always have Smart Guides on. (Optional)
After observation Jump to ImageReady and begin the rest of the animation below.
1. Go Window/Animation to bring the Animation Palette to the foreground.
2. Select the Move Tool (V) from the Toolbar
3. Hit Duplicate Current frame (1) from the Animation Palette
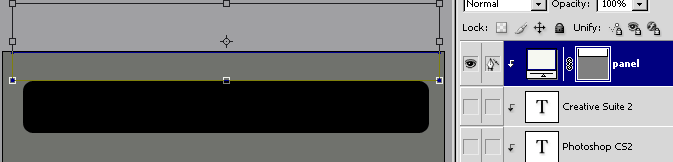
4. Activate/Select vector mask thumbnail (in the Layers Palette) of the first layer ‘panel’.
5. With Animation Frame 2 active, drag the Vector Mask into view as I have captured below.
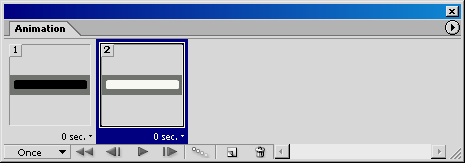
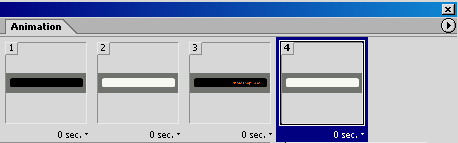
This is the animation palette view thus far.
Next:
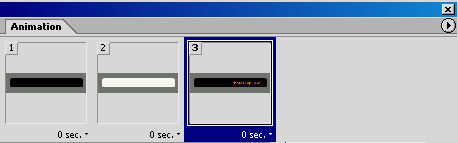
1. Duplicate Frame 2, to get get frame 3
2. Enable the ‘Photoshop CS2’ type Layer in the Layers Palette
3. Activate the first ‘panel’ layer and reverse it’s position from the previous procedure. Drag it out of view to the top.
Next:
1. Duplicate Frame 3, to get get frame 4
2. Disable the ‘Photoshop CS2’, and enable the ‘Creative Suite 2’ type Layers in the Layers Palette
3. Activate the first ‘panel’ layer and reverse it’s position from the previous procedure. Drag it into view again.
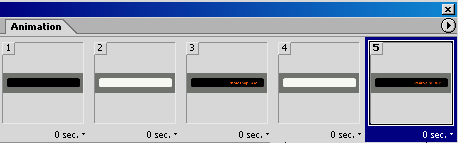
Next:
1. Duplicate Frame 4, to get get frame 5
2. Activate the first ‘panel’ layer and reverse it’s position from the previous procedure. Drag it out of view.
This represents the Core key frames for the animation.
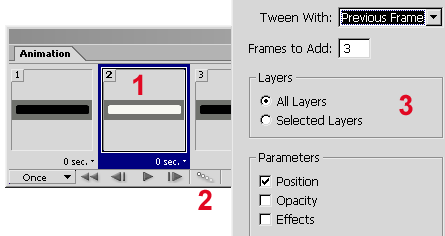
Tweening:
1. Select Frame 2
2. Click the Tween icon on the bottom of the Animation Palette.
3. Set the desired settings as I have captured. Use ‘Previous’ and ‘Position’ Parameters’.
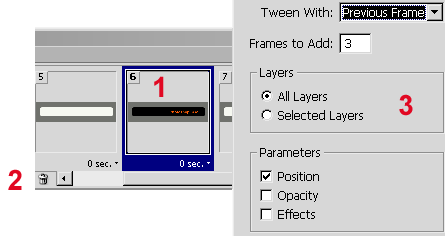
Tweening:
1. Select Frame 6
2. Click the Tween icon on the bottom of the Animation Palette.
3. Set the desired settings as I have captured. Use ‘Previous’ and ‘Position’ Parameters’.
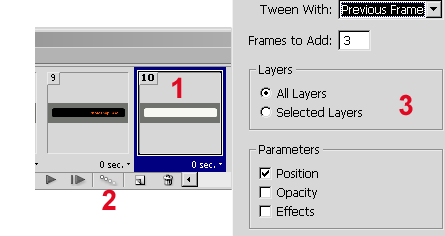
Tweening:
1. Select Frame 10
2. Click the Tween icon on the bottom of the Animation Palette.
3. Set the desired settings as I have captured. Use ‘Previous’ and ‘Position’ Parameters’.
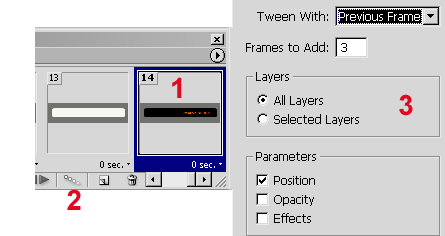
Tweening:
1. Select Frame 14
2. Click the Tween icon on the bottom of the Animation Palette.
3. Set the desired settings as I have captured. Use ‘Previous’ and ‘Position’ Parameters’.
Finally:
1. Select Frame 9
2. Set the Timer Playback control to 2 sec
3. Set the Loop Playback control to ‘Once’.

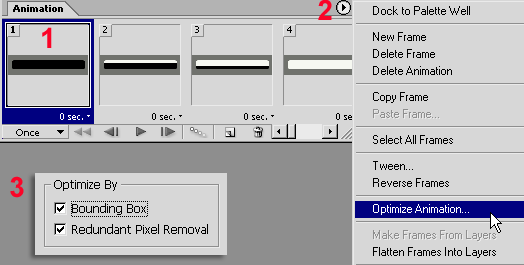
Optimize:
1. Select Frame 1
2. Select Animation Palette Menu ‘Optimize Animation’ option.
3. Select Optimize Animation options from the next prompt, then OK.
Finally, go ‘File/Export/Macromedia Flash Swf’ and set the next parameters, then OK.
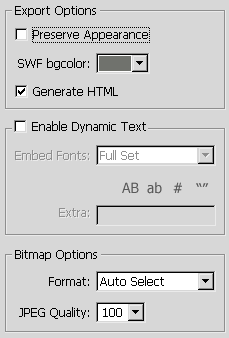
Note: I have mine set to Loop ‘Forever’ for easy viewing. (Final flash animation is only 3kb)