Here is a great way to simulate text wrapping to your Paragraph type with full formatting just like a Page Layout editing program.
This tutorial utilise’s text on a path for CS and above and assumes some knowledge of Photoshop Paths.
As a preamble to this tutorial and understanding Text on a Path in Photoshop, the three below captures reveal the various options when the Type Tool is active (hoving) on a Path.
A. Clicking out side of the Path with the Type Tool active will simply just produce a new Type Layer (without a type on the Path)
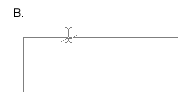
B. Mouse Over and click ON the Path will attach your Type Layer ONTO the Path itself.
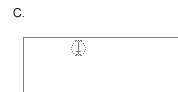
C. Mouse over and click INSIDE a Path will trap the Type Layer inside the Path.

Option C above, combined with Path Options Bar modifier features will produce the following result.
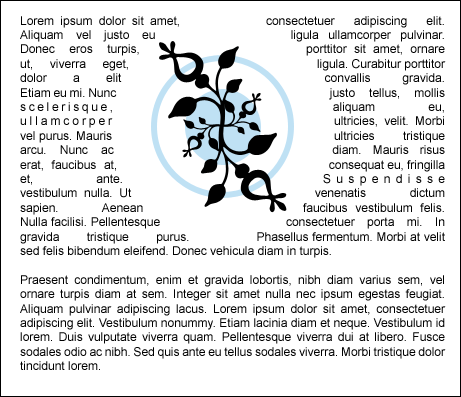
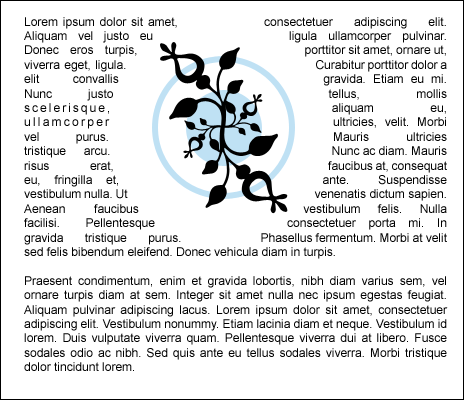
The below image simply captures text wrapping around a graphic with uninterrupted flowing from left to right.
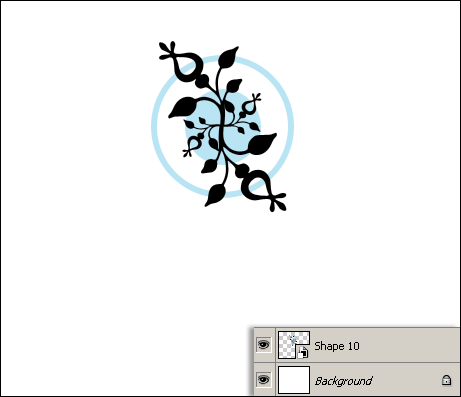
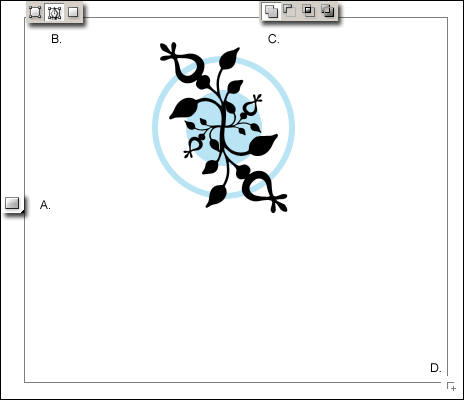
To begin, simply place a graphic element in the middle of your document, as I have captured below. (My graphic is a multi-layered Smart Object)
Next: (Items captured below)
A. Select the Rectangle Shape Tool from the Toolbar.
B. Activate the Paths Options bar feature for this Rectangle Shape Tool.
C. Enable ‘Add to Shape Area’ modifier feature for this active Rectangle Shape Tool.
D. Then click and drag from the upper left to lower right of your document.
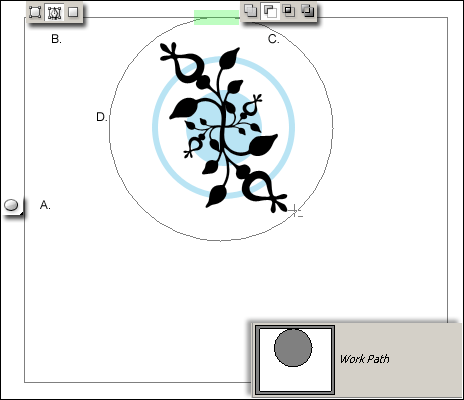
Doing so will create a closed rectangular path outline, as captured below.
Next: (Items captured below)
A. Select the Ellipse Shape Tool from the Toolbar.
B. Activate the Paths Options bar feature for this Rectangle Shape Tool.
C. Enable ‘Subtract to Shape Area’ modifier feature for this active Rectangle Shape Tool.
D. Then click and drag over the underlying graphic area as I have captured below.
Important: Ensure that the new Ellipse path touches/intersects the previously drawn Rectangular path, highlighted in green below.
Note: What this step is doing is simply cutting a hole in the original Rectangular path, as indicated by the Paths thumbnail via the Paths Palette. (Lower right)
Finally: (Items captured below)
A. Select the Type Tool from the Toolbar.
B. Mouse over inside the original Rectangular Path (notice the cursor change – encased in red below)
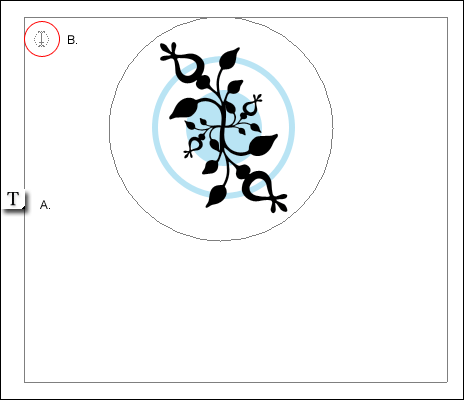
Click once, and the type insertion cursor will be blinking in the upper right corner on the inside of the path, as captured below.
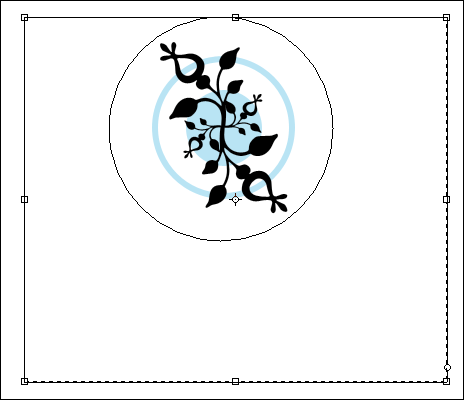
Type a few paragraph’s or copy/paste from another source and watch the text wrap around the image, as I have finalized below.
Additionally, open the ‘Window/Paragraph’ Palette and apply various text formatting.
If you are familiar with the Pen Tool, there are endless possibilities here to creating irregular paragraph type areas that simulate text wrapping.