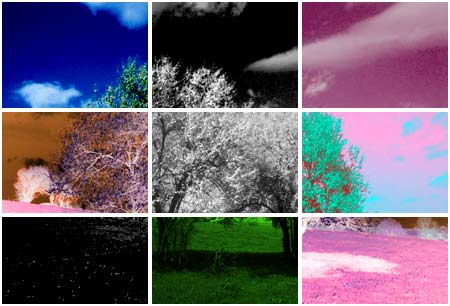
Simplify a step and repeat affect on a single image with the use of a selection and various Solid Fill/Adjustment Layers.
Open any image for this tutorial.
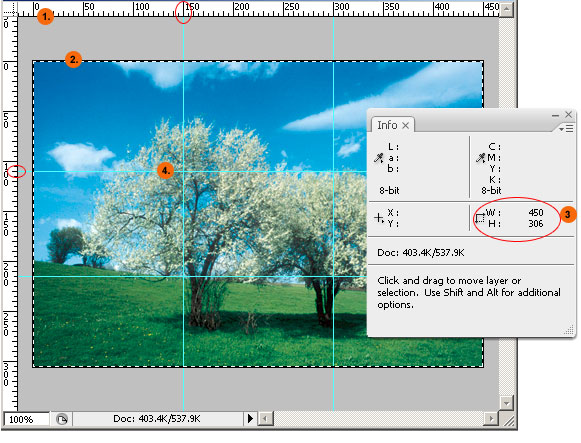
Get Measurements
- Press Ctrl + R (Mac: Command + R) to activate the Horizontal and Vertical Rulers.
- The Ctrl + A (Mac:Command + A) to select ALL. You should see a marquee selection surrounding the document bounds as captured below.
- Press the F8 key to bring the Info Panel to the foreground. Note the w/h (encircled in red below).
Essentially I want three rows and three columns of varying color effects for the same image. - Divide the w/h integers by the corresponding row/column number (in my case, it is 3).
Rows: 450 divide by 3 = 150 pixels apart
Columns: 306 divide by 3 = 102 pixels apart
So now that you have those numbers, drag two Vertical guides from the left Ruler Bar and place them 150 pixels apart.
Then drag two Horizontal guides from the top Ruler bar and place them 102 pixels apart.
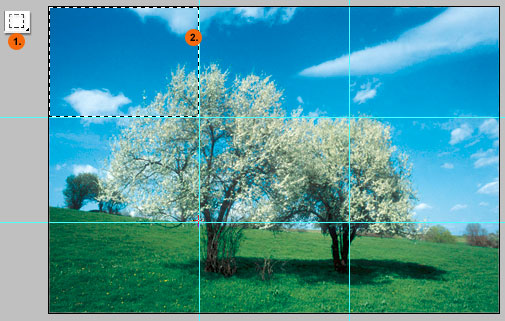
Create a Selection
Press the D key to deselect the original document selection from the preceding step.
- Click to activate the Rectangular Marquee Tool from the Toolbar.
- Click and drag from the uppermost left corner of the first guided section to create a selection (as captured below)
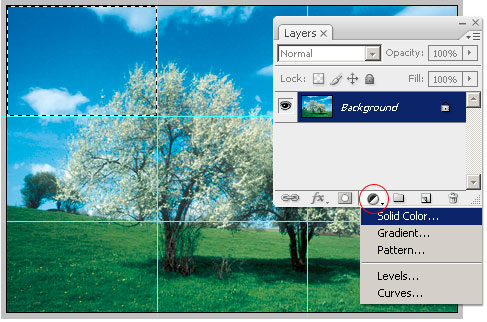
Apply Solid Fill or Adjustment Layer to the Selection
With the selection still active:
Go to the Layers Panel and click the ‘Create New Fill or Adjustment Layer’ (encircled in red) icon command and from the list choose Solid Color. There is a total of 17 items from the list to choose from so each divided section can contain any one of these.
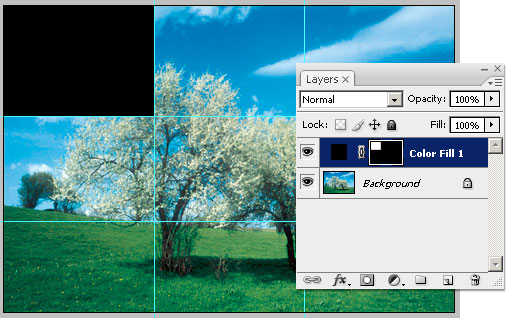
At the Solid Color picker choose Black (#000000) or any color of your choice depending on desired effect, then click OK to commit.
The result will be a solid color fill in the previously selected area as captured below. The Layers Palette will also contain a new Color Fill 1 Layer that contains the solid color (black) that can be changed at anytime by double clicking the Layer Thumbnail.
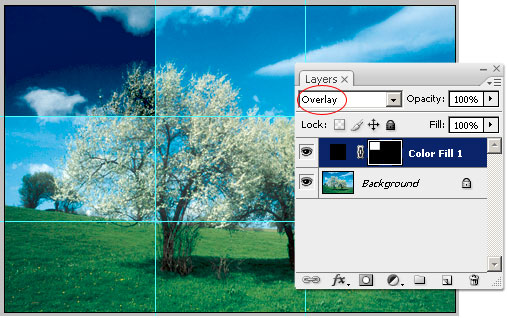
Obviously, a tab too solid! Simply change the blend mode to anything other than Normal from the Blend Mode list. I used Overlay.
Without creating a screen capture for every guided section (9 in total), repeat drag and draw a selection to the next divided area and apply any of the Solid Fill or Adjustment Layer to the selection.
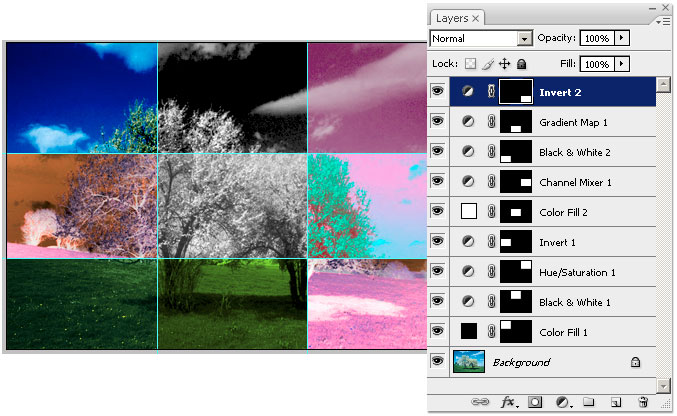
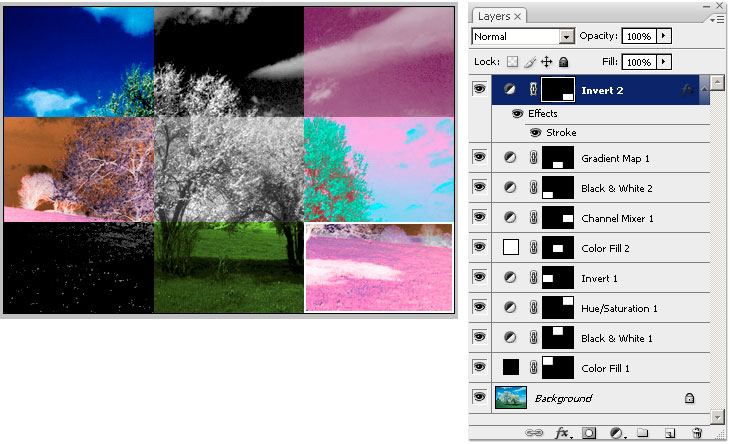
Below is a final sample of all the Fill/Adjustment options I used.
Looking in the Layers Panel, you can see exactly which Adjustment Layers (based on the title) and Color Fills (based on the thumbnail color) I used.
Add Border for each divided area
The quickest way to apply the same border to all the divided areas is to:
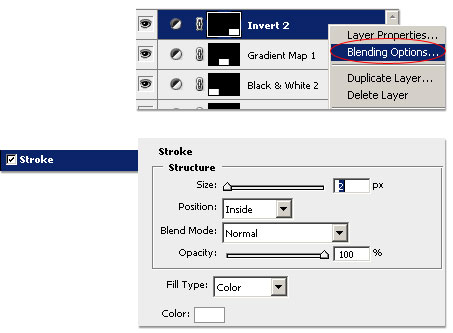
Right click on any of the Fill/Adjustment Layers (I chose the Invert 2 Layer) and from the context list choose Blending Options.
Tick AND select Stroke and set your desired options. My result will be a solid 2px white border on the inside of each divided area, as captured below. Click OK to commit Blending Options when finished.
Here is the resulting Stroke Layer Effect to the document and notice the appended live Layer Effect to the Invert 2 Layer in the Layers Panel.
Now all you have to do is replicate that Layer Effect for each of the other Solid Fills/Adjustment Layers.
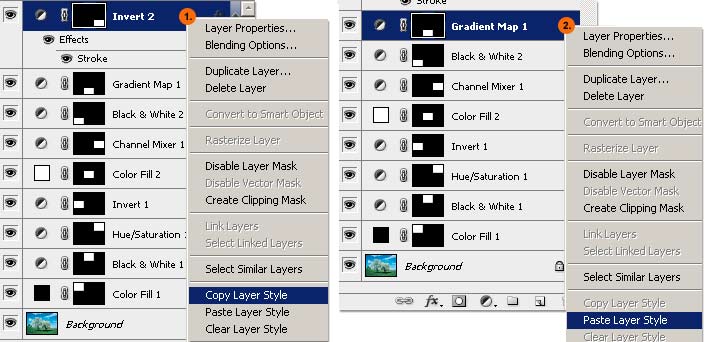
Right click on the Layer that already contains the Layer Effect and then from the list choose Copy Layer Style
Then right click on Layer that does not have one and choose Paste Layer Style.Repeat the Paste Layer Style process for all the other Solid Fill or Adjustment Layers that you wish to contain it.
Here is the final version: