-
First, start a new document, I used an equal size preset of 500×500.
-
Create a new empty Layer (Shift + Ctrl + N (Mac: Shift + Command + N)), just above the default document background Layer.
Next, set the Foreground Color to a variant of blue (I used #7AA6E8) and set the Background Color to Black #000000.
Next, go to ‘Filter/Render/Clouds’ to that your first effect is similar to what I have captured below.

-
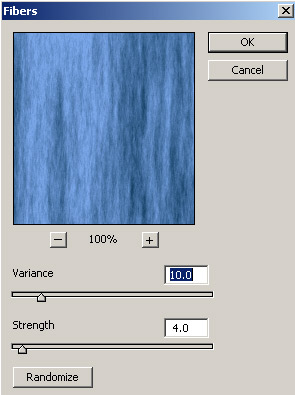
Next, go to ‘Filter/Render/Fibers’ and adjust the ‘Fibers’ Variance’ level to your preference, so that you can see (though in vertical direction) varying crests of waves within the render.
-
Next, we need to revert the direction of the water to a horizontal position.
So, simply, go to ‘Image/Rotate Canvas. 90 CW’ to position the image as I have captured below.
(This is why I used an equal size preset so that there would be no further resizing or positioning!)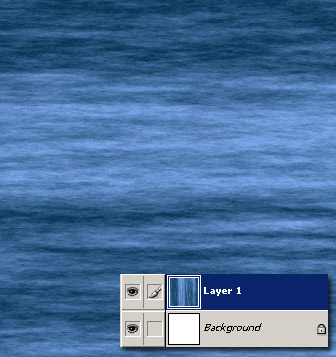
Looking good so far!
From here it’s simply a matter of adjusting varying color and adding some gradient layers for sky and mist effects.
-
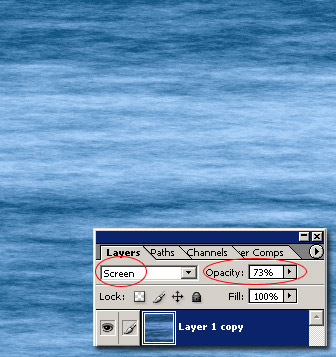
First, lets tone down the contrast in this image by duplicating the water Layer 1, and change the ‘Blending Mode’ to ‘Screen’, and bump down the ‘Opacity’ level.
Current texture and Layer structure, thus far.
Click here for full version of this Water Texture. (192.kb)
Now, on with the mist and sky effect.
-
Create a new empty Layer, (should auto name to ‘Layer 2’ at this point) directly above Layer copy 1. (Shift + Ctrl + N (Mac: Shift + Command + N))
Your ‘Foreground Color’ should still be the variant of blue (#7AA6E8) that we set earlier. Then select the ‘Gradient Tool (G)’
 on the ‘Toolbar’, and up on the ‘Options Bar’, select the ‘Foreground to Transparent’ preset from within the ‘Gradient Preset Picker’.
Select the ‘Linear Gradient Tool’
and the ‘Blending Mode’ to ‘Normal’, with ‘Transparency’. -
With the new empty ‘Layer 2’ (that we created above) active and the ‘Gradient Tool (G)’ still selected, click and drag the just beyond the midway area of your water texture (red circle).

-
Create a new empty Layer, (should auto name to ‘Layer 3’ at this point) directly above Layer 2. (Shift + Ctrl + N (Mac: Shift + Command + N))
In this Layer we will create the dividing mist area between water and sky.Set the Foreground Color to White (#ffffff), Background Color to Black (#000000). Then select the ‘Gradient Tool (G)’
on the ‘Toolbar’, and up on the ‘Options Bar’, select the ‘Foreground to Transparent’ preset from within the ‘Gradient Preset Picker’. 
Except, this time change the gradient style to ‘Reflected Gradient’
 and the ‘Blending Mode’ to ‘Normal’, with ‘Transparency’.
 Then in at the mid area of the image click and drag a short distance.
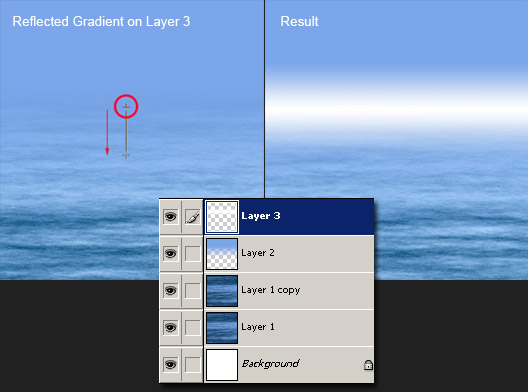
I nudged the Layer 3 mist Layer downward a few notches with the Down Arrow key, and knocked its Opacity Level down to 66%. (Ultimately, you adjust to what your happy with!)
Here’s how it looks thus far.
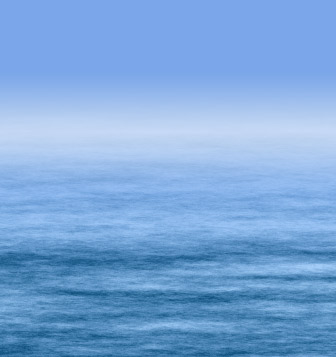
This and of itself is fine, but just another step to add clouds to the skyline.
-
Simply duplicate ‘Layer 2’, so that your Layers Palette looks like the below.
Ctrl + Click (Mac: Command + Click) on that Layers Thumbnail (encased in red below) to select it.

You should now see a marquee selection around that Layer. (Layer 2 copy)
Finally, set the Foreground Color to the Blue we used earlier (#7AA6E8) & Background Color to Black (#000000).
Then go to ‘Filter/Render/Clouds’, to produce the below result.
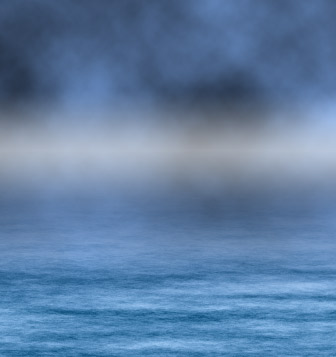
A little harsh, so to compensate, simply set that Layers (Layer 2 copy) ‘Blending Mode’ to ‘Overlay’, and bump down it’s Opacity Level to one that your most compfortable with. (I used 70%)
And here is the final result.
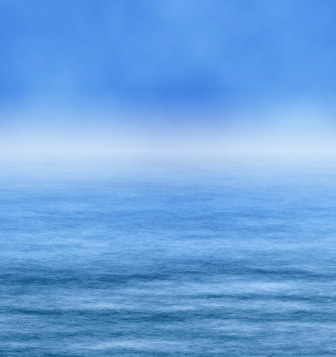
Here is the full Ocean Mist Scene Preview. (136kb)
Here is the full Ocean Mist Scene 2 Preview. (118kb)
Here’s a detailed walk-through to simulate an ocean mist scenery using Photoshop CS ‘Fibers’ filter and varying Gradients combined with alternating Blending Modes.