There’s a variety of ways of applying a ‘Layer Mask’ to achieve the knockout effect. (I’ll just show the most flexible example)
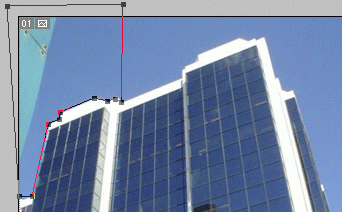
The most flexible option is the combination of applying the ‘Pen Tool (P)’ to add anchors points and in combination with the ‘Convert Anchor Point Tool’ to define your selection. Below I just did a small portion of the image as an example.

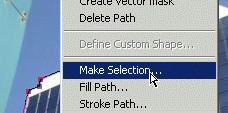
Then right-click (Mac: Command + click) and choose ‘Make Selection’, with a ‘Feather Radius’ of 0 pixels.

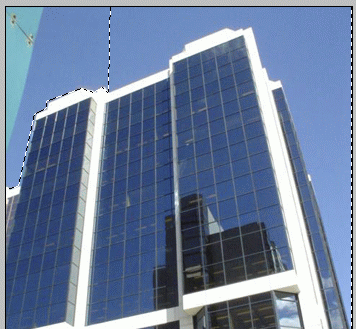
Once the selection is made ( you should see a marquee) then hit the ‘Add Layer Mask’ icon in the ‘Layers Palette’ to knockout that area.

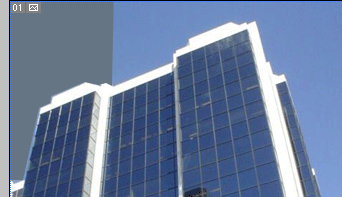
This is how the knockout should look in this example.

This enables the ‘Brush/Pencil Tool’ in combination with the colors ‘Black/White’ the power to ‘Hide/Reveal’ selected areas of your image. (Black = Hides/ White = Reveals) Zoom in and touch up any over lapping areas.
Tips:
- Other ‘Tools’ to use for making selections include ‘Lasso Tool (L)’ and sub tools
- Some ‘Adjustment Layers’ and ‘Filters’ can also be applied. (Ctrl (Mac:Command) + click the ‘Layer Mask Thumbnail’ to select it, then apply. Otherwise, it will be applied to the image layer itself.
- ‘Blending Styles’ can also be applied.
- Right-click (Mac: Command + click) on the ‘Layer Mask Thumbnail’ in the ‘Layers Palette’ has more options available..
(Also found under the ‘Layer’ menu item and up on the ‘Options Bar’.) - ‘Apply Layer Mask’ merges the ‘Layer Mask’ with the linked image. The ‘Hide/Reveal’ options are no longer available until a new ‘Layer Mask’ is created.
- There is a limit of one active ‘Layer Mask’ per layer. But when you click on the ‘Add Layer Mask’ icon the second time will add a ‘Vector Mask’.
- Combine a ‘Layer Mask’ with a ‘Vector Mask’ will enable both the ‘Brush Tool’ and ‘Pen Tool (P)’ features.
- Combining a ‘Vector Mask’ also enable the use of the ‘Shape Tools (U)’ and its ‘Option Bar’ features.
- A saved version of the selection can be found under the ‘Channels ‘ tab of the Palette.
