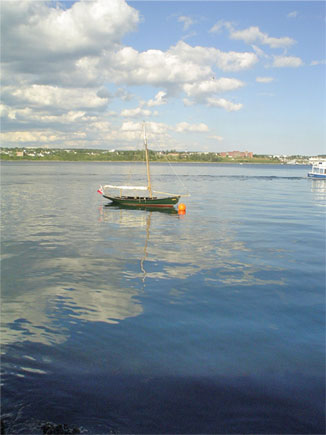
The image below will be the target of this tutorial and I will show you how to enhance the sky colors.
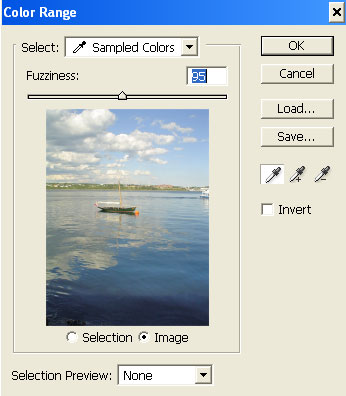
With the target layer active, go to ‘Select/Color Range’ menu command.
You will be prompted with the below dialog.
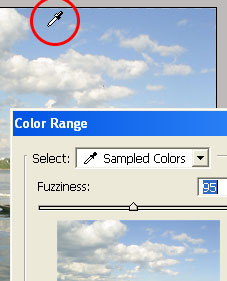
Drag your mouse over onto the main document view and your curser will change to an Eye Dropper. Then click an area of the blue sky to begin your selection.
Next you have two options:
- Hold the Shift key and continue clicking on the blue areas to add to your selection. Hold Shift + Ctrl (Mac : Command) + clicking will show you a mask preview within the Color Range dialog.
- Or press the Control key (Mac:Command key) to preview the temporary selection mask within the Color Range Preview window, as captured below…
Note: Releasing the Ctrl key toggles the original view of the document.
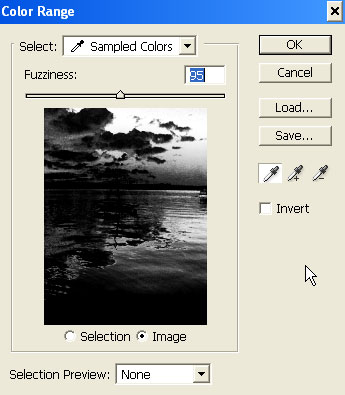
… then adjust the ‘Fuzziness’ control slider to add or subtract from the color range selected. I adjusted mine to the right to around 109. Then clicked OK to get the following selection. (Yours will vary obviously if you use a different picture)
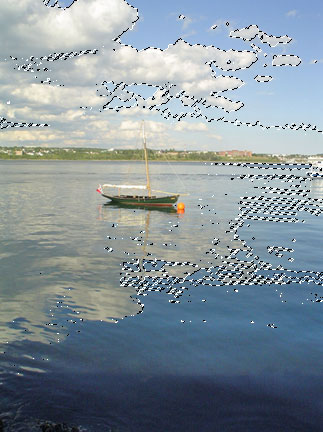
Next, with the selection still active, go to ‘Select/Feather’ to apply a slight softness to the selection. I used 1.3, yours may vary, but it’s generally a good idea to do this since my color range varies greatly you don’t want a complete drop off in color variations.

Optional: Go ‘Select/Save Selection’ in case you need to use it for further modifications.
Finally, with the Selection still active, hit ‘Ctrl + J’ (Mac:Command + J) to copy its contents to a new layer.
Here is the Layers Palette view thus far. I enlarged the Thumbnail view for easy viewing.
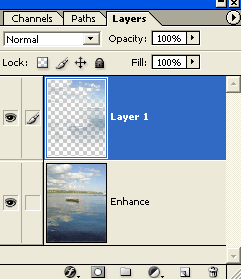
Lastly, with that selection layer change the blend mode to one of ‘Multiply, Color Burn or Linear Burn’. The below final result used the Multiply blending mode.
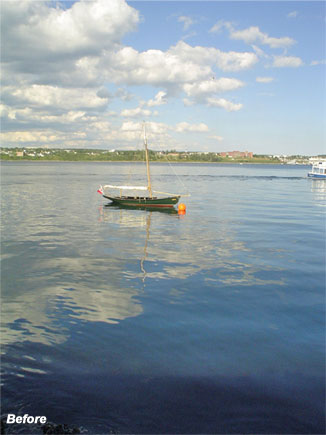
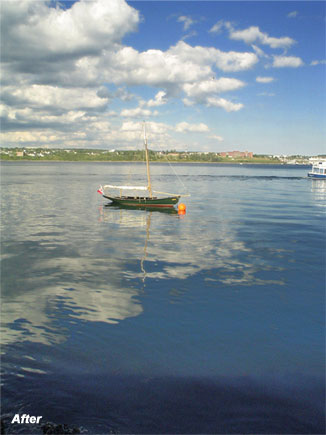
Summary:
- Open Color Range Command on target layer.
- Click in document area to define the color range, alternating between Shift key for adding to the selection, Ctrl key for Color Range preview Mask & the Fuzziness control slider to increase or decrease from the color range.
- Feather the Selection achieved from the Color Range Command.
- Ctrl + J to copy the selection to its own floating layer. (So as to not affect the original image)
- Change Blending Mode of the new floating selection layer to Multiply.
