A simple Transform trick and your on your way to creating endless custom shapes for reuse in your projects, or simply experiment to your hearts content to create that perfect logo.
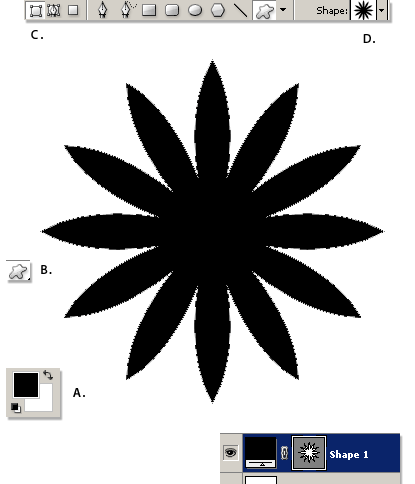
- Set Foreground color to your preference. (I used black)
- Select the Custom Shape Tool.
- Set ‘Shape Layers’ Options Bar feature.
- Select any custom shape from the preset picker.
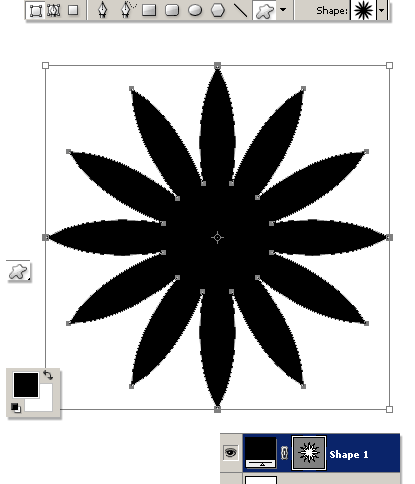
Next, hit the ‘Ctrl + Alt + T’ keys on the active ‘Shape 1’ layer to begin the Transform, as indicated by the bounding handlers below.
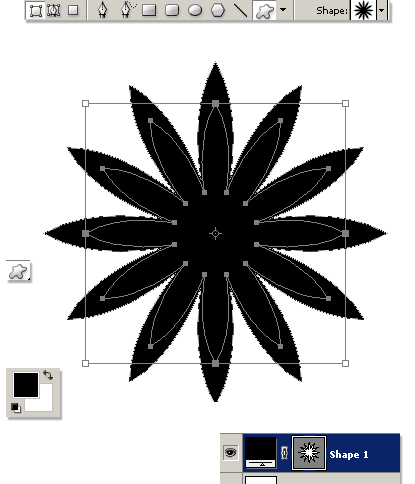
Click and drag INWARD from any of the corner handler/anchor points, as captured below, then hit the ‘Enter/Return’ key to commit.
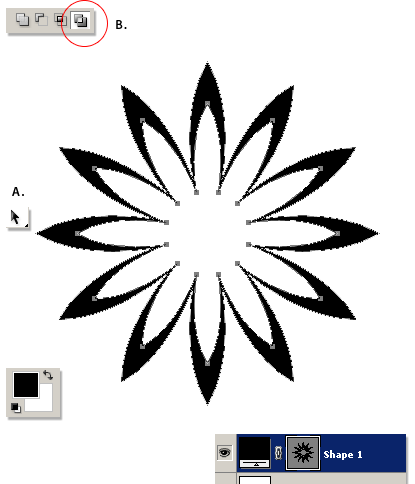
- Switch to the ‘Path Selection Tool’
- Set the Options Bar ‘Exclude Overlapping Shape Areas’ feature (encircled in red) to create a knockout, as captured below..
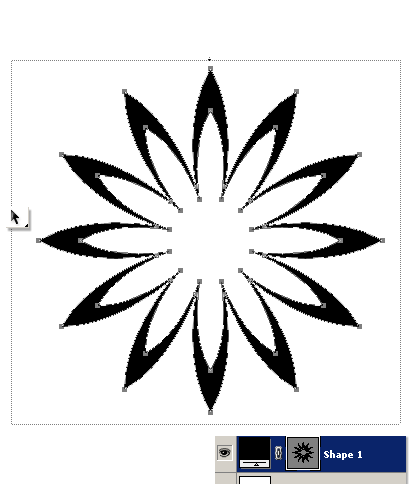
With the Path Selection Tool still active, click and drag from upper left to lower right to select both paths. In doing so you should see a static marquee selection as captured below, and all anchor points will be highlighted as a result.
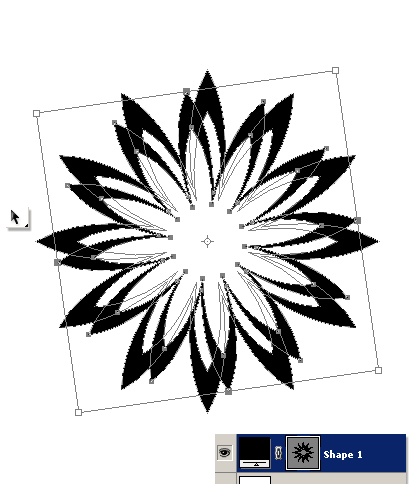
Now that all anchor points are selected, Ctrl + T to get to the Transform handlers again. Resize inward and rotate just slightly, as I have captured below, then hit the ‘Enter/Return’ key to commit.
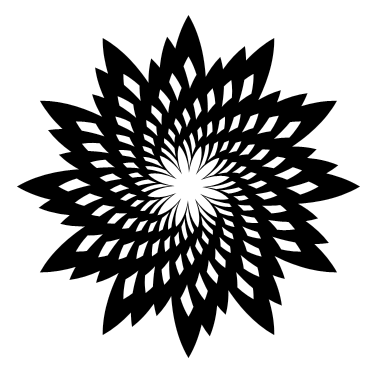
Finally, hit the ‘Shift + Ctrl + Alt + T’ multiple times to repeat the last transform, and the below is the effect.
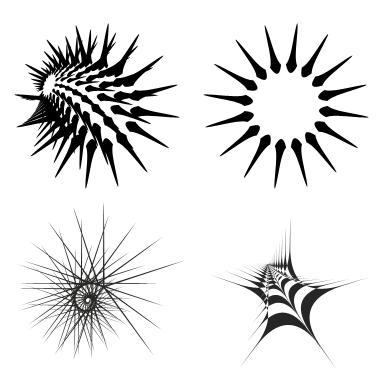
Experiment with other preset shapes for 1000’s of various effects using the above transform technique. Other examples:
Refer to ‘Adding Custom Shapes to the Preset Collection‘ tutorial for more details.