1. Here’s a simple style effect to create a candy cane effect combined with the ‘Pen Tool’ to create the shape.
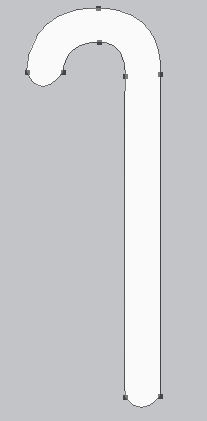
2. Start with the ‘Pen Tool (P)’ and roughly draw in the shape of the cane. Then use the ‘Convert Anchor Point Tool’ to smooth out the corners as I have captured below. (You can see where I made my Anchor Points)

3. (Foreground color determines the color of the shape that you draw, with ‘Shape Layers’ option selected.. I used white in this case / #ffffff)
With the Pen Tool draw in the shape of the ane,)indicated by the solid line filled with white and the dark dots are the anchor point registration marks) making sure that the ‘Shape Layers’ option is selected on the ‘Options Bar’. Then with the ‘Convert Anchor Point Tool’ adjust the necessary anchors to a curve as I have captured below.
4. From here on it’s all blending styles. So, right click on the shape layer in the Layers Palette and choose ‘Blending Options’ as I have captured below.

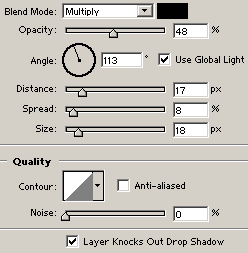
5. First, an optional simple Drop Shadow.
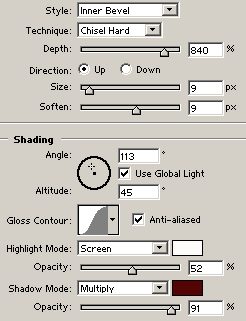
6. Next, a ‘Bevel and Emboss’.
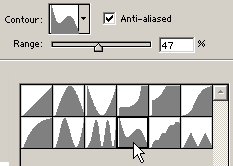
7. Then I added a Contour map.(Click on the ‘Contour Map’ icon to get the full list and select the ‘Rolling Slope – Descending’ contour)
8. Then the Stroke. The Gradient is what makes this candy cane effect.
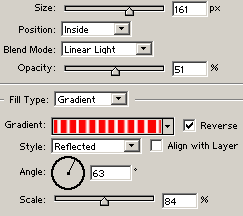
9.Click on the Gradient map window in the Stroke panel, and below is how the gradient was put together.

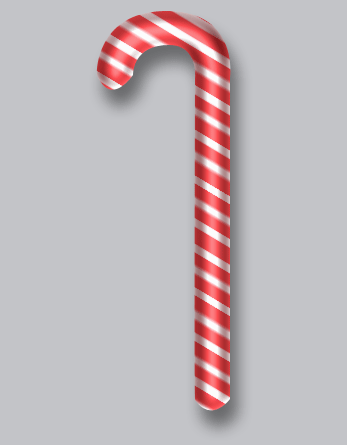
9.Here’s the final result.
NOTE: Resizing the cane shape layer, will require adjustment of the blending modes.