Auto Vector Mask Bitmap Objects
Ensure an object is active in the Layers panel, in my case a Bitmap, otherwise you will be greeted with an ‘Incorrect selection for this operation’ message.
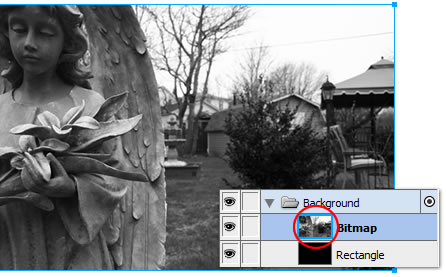
Then go to the Commands > Creative > Auto Vector Mask menu command option.
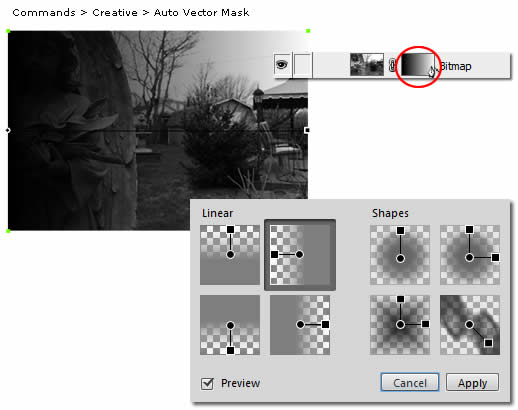
At the Auto Vector Mask dialog, choose from a variety of Live Gradient Presets, then click Apply to commit.
Note: Enable Preview to see live changes as you toggle among the Vector Mask presets.
Once the Auto Vector Mask is applied, select the Bitmap Mask thumbnail to access the Live Gradient Mask controls. Use these Live Gradient control points to redefine/reposition your chosen preset, in this case a Linear Vector Mask.
Select the circle control end-point to reposition the entire Gradient.
Select the cube control end-point to reposition the Gradient in any direction.
Select the black line connecting the two end-points, and drag to reposition in a clockwise or counter clockwise Rotation.
Notes:
Hold the black line and the the Shift key to constrain the rotation to a 45 degree increments.
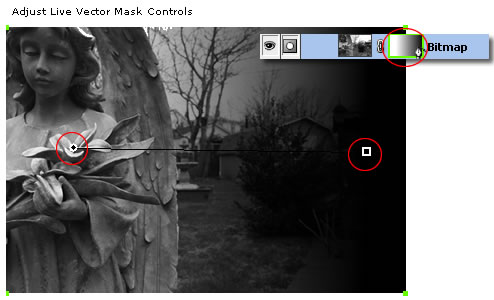
Double click, either the circle or cube end points, to reset to a default center position.
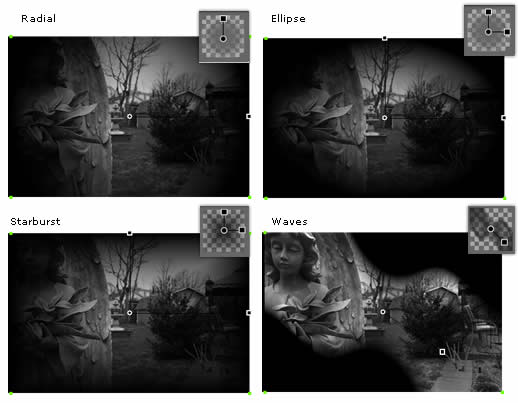
Below are examples of the other Auto Vector Mask presets applied to the same bitmap.
Other Notables:
Auto Vector Mask works with the following object types: Type objects, Auto Shapes, Groups, Symbols, Rich Symbols, Paths and Bitmaps.
Final Words: Reversing an Auto Vector Mask
Since an Auto Vector Mask takes advantage of Live Gradients, and though the option is not availaable in the command dialog, it is still possible.
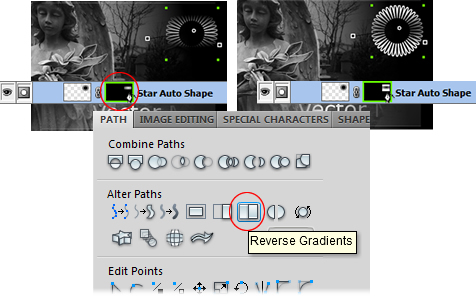
To reverse a Gradient, first select the Vector Mask thumbnail, then open the Path Panel (Window > Other > Path) and choose the new Reverse Gradients icon command option (encircled in red below).
