Here is a few simple steps to create eye catching artwork using the threshold menu command (combining prefab shapes).
This tutorial assumes your images are already prepared with layer mask, paths or alpha channels.
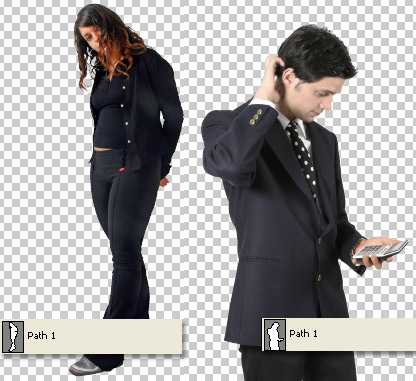
Below are the two images I will use, courtesy of AbsolutVision.
AbsolutVision images are a great choice as they come with clipping paths and alpha channels isolating the objects as I have captured below.
Let’s begin this simple process.
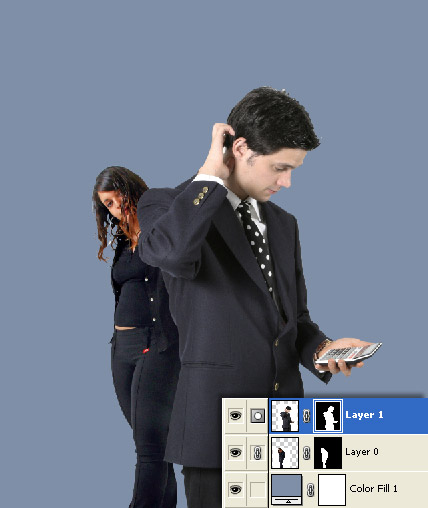
Position and place the two separate images on there own layers and add a background color (I used #838EA5) as I have captured below.
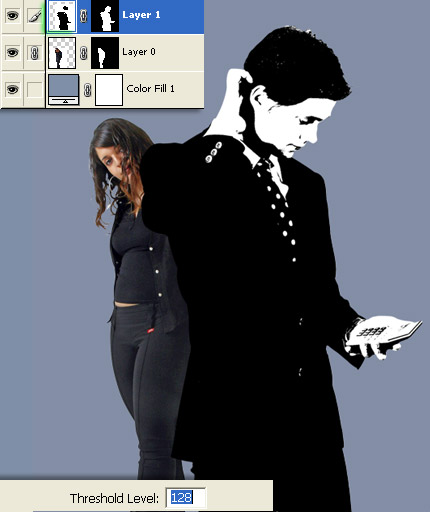
Next, select the ‘Layer Thumbnail’ of Layer 1 (highlighted in green below), then go to the ‘Image/Adjustments/Threshold’ menu command and accept the default value as I have captured below. (Adjust the Threshold slider for variations)
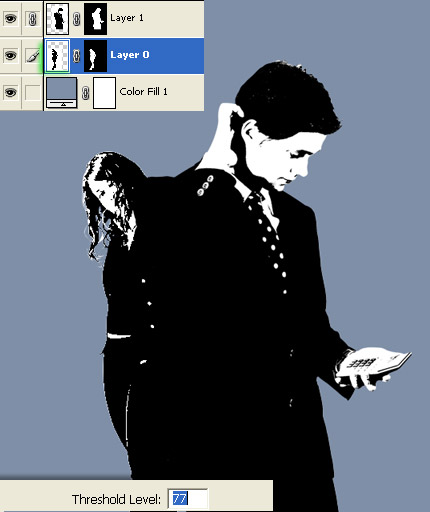
Next, select the ‘Layer Thumbnail’ of Layer 0 (highlighted in green below), then go to the ‘Image/Adjustments/Threshold’ menu command and adjust the slider value to 77 as I have captured below.
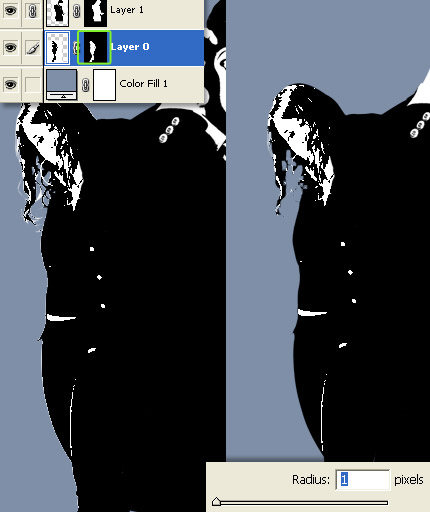
Next, select the ‘Layer Mask Thumbnail’ of Layer 0 (highlighted in green below), then go to the ‘Filter/Other/Minimum’ menu command and keep the default ‘Radius’ of 1 as I have captured below. This process is one of many ways to ‘de fringe’ white halos created from the previous step. As captured below, the left side is the result of the above threshold. The right has the applied ‘Minimum’ filter applied.
All that remains is to combine some prefab shapes above the background color layer.

Here is my final result with some basic shapes added.
