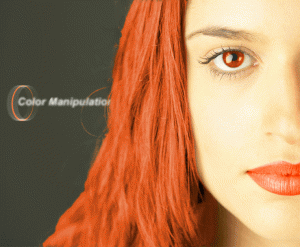
Here’s some simple technique’s to adjust or manipulate elements of color within a given photo.
Tools used will be some adjustment layers and the extract tool, so follow along and have fun.
Below is the original picture I will be using, courtesy of ablestock.com via NAAP membership.
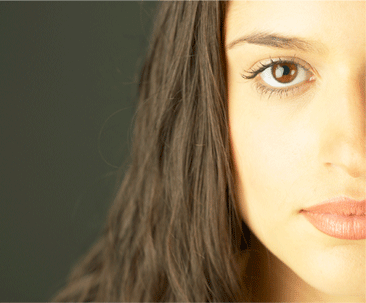
- To start things off I’ll manipulate the color of the eye.So, set the foreground color to one of your choice. I used #FD6E13.
Then, select the ‘Elliptical Marquee Tool (M)’ from the ‘Toolbar’, Ctrl + Plus key to zoom in, and draw a selection around the eye as I have captured.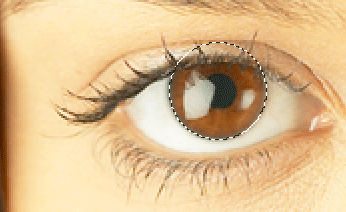
- Next go to ‘Layer/New Adjustment Layer/ Hue/Saturation’ menu command and on the next screen, check the ‘Group with Previous Layer’ option. (As I have captured below)
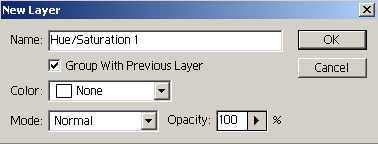
- Next, your in the ‘Hue/Saturation’ control panel.
Select the ‘Reds’ from the ‘Edit’ list, and alter the sliders as I have captured below. ( Ultimately, the amount of adjustments is up to you.)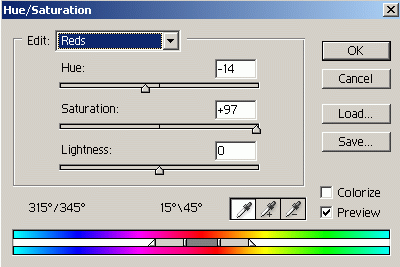
- This is what your image should look like, and below is a capture of the ‘Layer’s Palette’ thus far.As you can see the ‘Hue/Saturation’ layer is grouped above the original. No affects or damage done directly to the original.
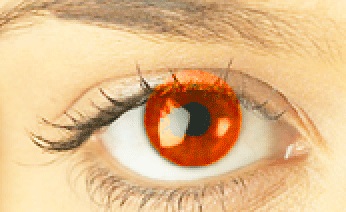
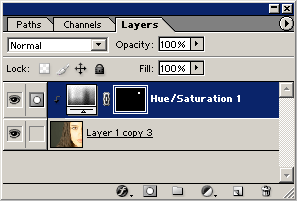
- Next, lets clean up the excessive areas, by selecting the new ‘Hue Saturation’ layer, set the foreground color to ‘Black’ (D key), then select the ‘Brush Tool (B)’ and paint the excessive areas away.TIP: Adjustment Layers include ‘Layer Masks’, so by setting the foreground to ‘Black’ and painting over areas ‘hides’, using ‘White’ foreground ‘reveals’.You can also reduce the ‘Opacity’ of the ‘Hue/Sat’ layer to soften the affect.
Below is my cleaned up area followed by the progress, thus far.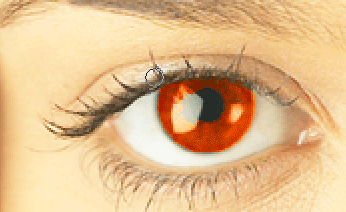
- Next lets change the color of the lips.
Select the original image layer, zoom in on the lips area, then select the ‘Pen Tool (P) (make sure ‘Paths’ is turned on up on the ‘Options Bar’.) and trace around the lips to a complete path.Then use the ‘Convert Anchor Point Tool’ to create curvature to fit the shape of the lips.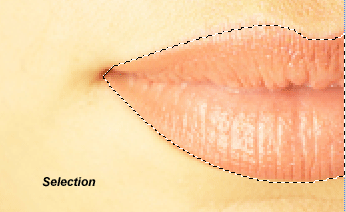
Next, right click on the path and choose, ‘Make Selection’ from the context menu, leave it at the default ‘Feather Radius’ of ‘0.5’.
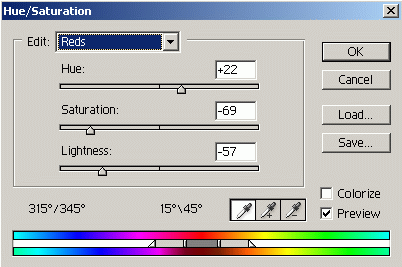
Now we have a selection made of the lips. As in step 3, go to ‘Layer/New Adjustment Layer/ Hue/Saturation’, select the ‘Group with previous Layer’ option, and as captured below, ‘Edit’ the ‘Reds’.
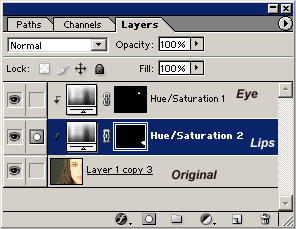
- Here’s how your ‘Layer’s Palette should look, followed by the new image thus far.
- Finally, let’s alter the hair color. For this we will use the ‘Extract Tool’.
So to begin, duplicate the original image, but select the last layer in the stack. (As I have captured below)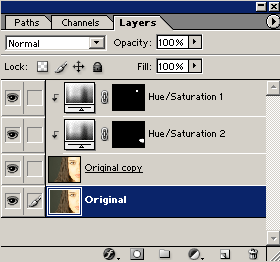
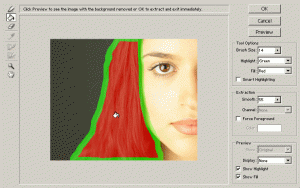
- Then hit the ‘Alt + Ctrl + X’ key combination to open the ‘Extract Tool’.Once inside the ‘Extract Tool’ control panel, select the ‘Edge Highlighter Tool (B)’ (first on the left) and with a relatively small brush size (choose on the right) trace around the hair line.
Be sure to have the ‘Show Highlight’ option ticked. (second last option bottom/right)Edge Highlighter screen shot here.
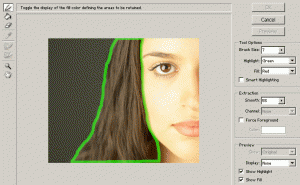
Next select the ‘Fill Tool (G)’ (second on the left) and click inside the area of your drawn edge selection.
Be sure to have the ‘Show Fill’ option ticked. (last option bottom/right)Next, hit the ‘Preview’ command option (third top/right), to see how the extraction looks.
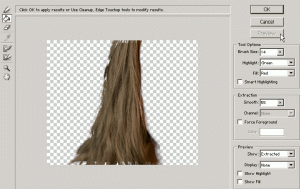
Not all will be perfect, especially in this case since there was not enough contrast between the background color and the edge of the hair.
Preview screen shot here.
So to alleviate the somewhat poor extraction (in this case) select the ‘Edge Touch up Tool (T)’ and slowly drag the ‘circle/cross hair’ cursor around the edge of the hair. (esp. in areas that appears messed up) This should smooth out some areas.
Note: most of Photoshop’s shortcuts work in this panel, like undo. So you may need to make use of them.
Also, hold the ‘Alt’ key and the ‘Cancel’ command button reverts to a ‘Reset’ command button. However, if you reset, you will lose any touch ups done thus far.
Edge Touch up Tool screen shot here.
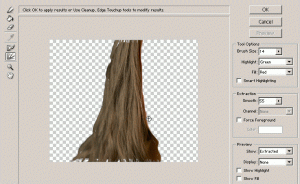
Once you’ve completed the extract/touch ups, hit the ‘Ok’ command option.
- Now, back to the canvas, here’s what your ‘Layer’s Palette’ should look like, as I have captured below.
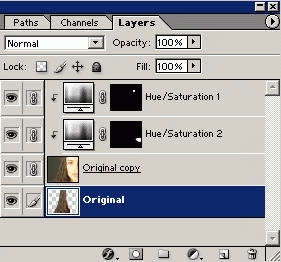
- Next, drag the ‘Original’ (which is the hair) from the last one in the stack to the uppermost position in the stack. (As I have captured below)
Alternately: Ctrl + Shift + ] (Right Bracket key) combination will move the selected layer to the uppermost position in the stack.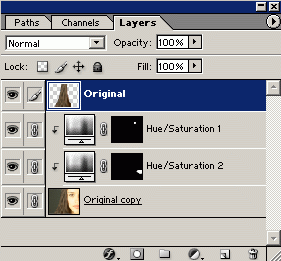
- Almost there!.
Have the ‘Original’ (extracted hair layer) selected, and repeat as we did for the other facial elements (in steps 3 & 8).
‘Layer/ New Layer Adjustments/ Hue/Saturation’, on the next prompt tick the ‘Group with Previous Layer’ option and tick the ‘OK’ command. Then the ‘Hue/Sat’ control panel. There’s so many directions to go here to alter the color of the hair, so I stuck with the red theme, as captured below.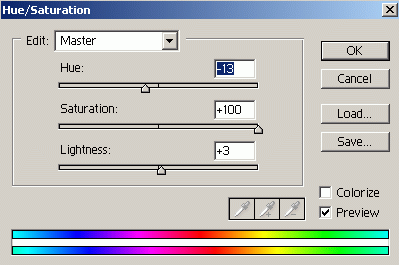
- Here’s what your ‘Layers Palette’ should look like and below that is the final result.
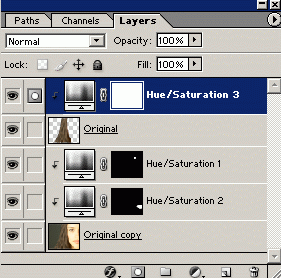 Final Note: some of the areas that came out shabby in the extraction process may appear visible depending on what color you go for here, so you may want to clean them with some simple smudging.
Here’s my hig res version.

