Here’s a few simple steps to achieve another method of eliminating the background of an image when exporting the image to a page layout, vector-editing application, or printing purposes.
We will create a ‘Clipping Path’ to isolate the nontransparent portion of an image so that layout programs print the image as expected, otherwise, it will display and print the transparent portions of an image as white.
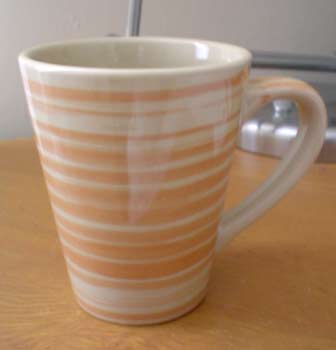
Below is the working image, and the goal is to separate the cup from the rest of the image.
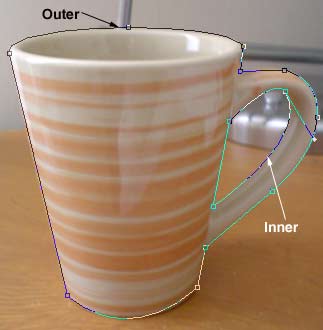
- Start with the ‘Pen Tool (P)’ (with ‘Path’ Options Bar feature active) (or any other Selection Tool) on the Toolbar and trace around the outer edge of the cup, until you have a complete path. (As I have captured below) To adjust the curve of the Path use the ‘Convert Anchor Point Tool’ (Hidden under the Pen Tool on the Toolbar)This image will require two paths, one on the outer edge and one for inside the cup handle.The ‘Outer Path’ was first created using the above mentioned tools. To continue with the ‘Inner Path’, as a separate path, make sure all other segments are closed. (IE. as the Outer Path is closed by connecting the first and last Anchor Points)) Then with the same active tools create another closed path for the ‘Inner Path’.
Your ‘Paths’ palette should have a single Path Layer. (As captured in step 3)
Side Note: If you step away from after creating the initial ‘Outer Path’ and move on to other tools, chances are you will end up with separate ‘Path’ layers as I have captured below.
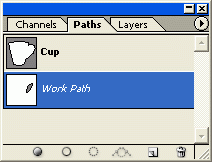
To get the mistaken separate outer path back into the original, simply Select it, in the ‘Paths Palette’ as I have captured above (Entitled ‘Work Path’, and highlighted in blue – meaning its the active layer).
Then ‘Ctrl + C’ to copy the path to the clipboard. Select/activate the original ‘Cup’ Path, then ‘Ctrl + V’ to Paste. You should then have like the below capture.
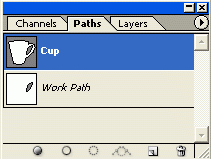
Then delete the stray ‘Work Path’. Repeat the copy, paste and delete process of other stray segments.
Ultimately, to prevent from creating stray path segments, keep the Paths Palette visible, instead of the Layers Palette, and keep the current path active. (Highlighted in blue)
- Next, go to the ‘Paths Tab’ thats docked into your ‘Layers Palette’, and notice the clipping path (with default name of Work Path) in the ‘Path Thumbnail Preview’.Note: If the Paths Tab is not visible, go to ‘Window/Paths’ menu command.
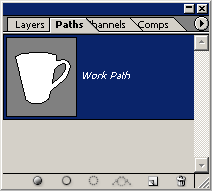
Note: If you use another ‘Selection Tool’ then the default ‘Work Path’ will not be visible until you select the ‘Make Work Path’ icon (4th from right) on the bottom of the Paths Palette. (Then proceed below)
- Next, double click that clipping path (one with default name of Work Path) in the ‘Path Thumbnail Preview’ and the following dialog should appear. Give the ‘Work Path’ a friendly name as I did (‘Cup’) and choose OK to complete saving of the path.

- From the ‘Palette Options Menu’ button list, choose ‘Clipping Path’ as I have captured below.
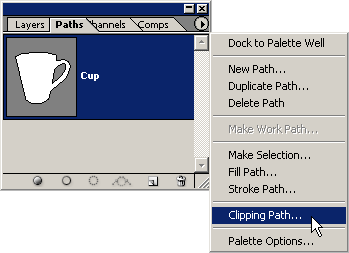 As you can see in the thumbnail preview, the path defines the cup area of the image to show when we need to place it another program or for print.
 - Next, choose the ‘Cup’ work path from the ‘Path’ drop down list, and leave the ‘Flatness’ empty. Then ‘OK’ to complete create ‘Clipping Path’ process.

- The Clipping Path is created, so Save your file as a .psd as you normally would to save an original document. Then in any other Adobe Program that has the ‘File/Place’ command, (in my first example below I used Adobe Illustrator), as captured below…Below, are just some other possible uses for this Adobe Photoshop Clipping Path option. (Picking up where step 7 left us)
Integration with Adobe Illustrator:
Open Adobe Illustrator, and have a new document ready, then go to ‘File/Place’ command option then at the prompt and choose the ‘Flatten Layers’ option.

As captured below, the original .psd clipping path is visible and the cup remains without the background. (Inside Adobe Illustrator screen shot)
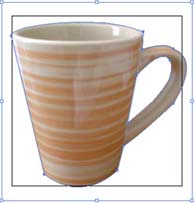
Integration with Adobe Illustrator:
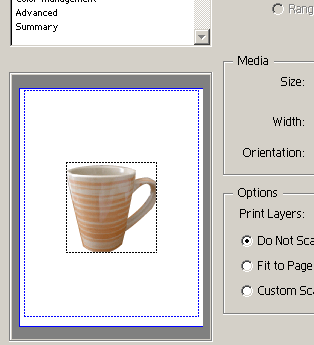
Another use for this Clipping Path, is that when Printed inside Adobe Illustrator (‘File/Print (P)’), the Clipping Path remains as it keeps the Cup object separated from the background, as our original intention. The below screen capture shows a snippet of the Print dialog box.
Still inside Adobe Illustrator, I can add additional objects (best kept on there own layers) and filter affects (such as Drop Shadow), as I have captured below, and the Photoshop Clipping Path still retains the transparency effect.

Integration with Adobe Acrobat:
Still inside Adobe Illustrator, you can save this document with the Photoshop Clipping Path, as a .pdf (‘File/ Save As/ and choose .pdf from the list options.
From the ‘Adobe PDF Options’ dialog, I set the features as captured below (some options here are for CS versions only).
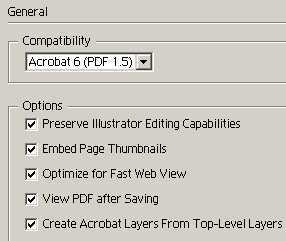
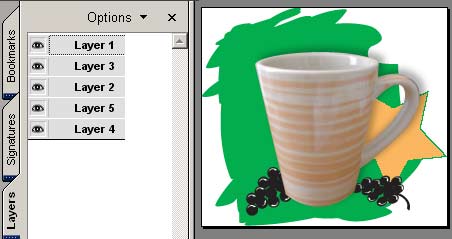
Adobe Acrobat automatically opens (cause I set it in the above options), and still the Photoshop Clipping Path remains. And even better, with the new CS Suite, theres a new option to write and preserve layers (as you can see on the below, left) . Great possibilities and even greater flexibility for object placement.
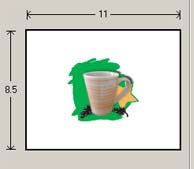
As within Adobe Illustrator, Acrobat printing also preserves the original Photoshop Clipping Path, as I have captured below.
Integration with Adobe Indesign:
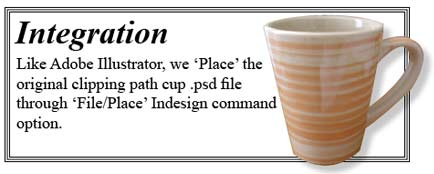
Like in Adobe Illustrator, we ‘Place’ the original clipping path cup .psd file through ‘File/Place’ Indesign command option (in a New Document). Again, the Photoshop Clipping Path still remains, and lots of room for flexibility of that .psd object. (Like Drop Shadows – and much more, as I have captured below)
Integration with Other Programs:
If you are using a page layout program that cannot place .psd files as I demonstrated above, then choose ‘File/Save As’ within Adobe Photoshop and choose ‘Tiff’ file format for printing to non-PostScript printers or ‘EPS, DCS, or PDF’ file format for printing to Postscript printers.
Note: If you deleted the background around the image in the Photoshop .psd file, you still have to define the area with a clipping path before converting the file to TIFF or EPS.
