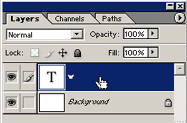
1. Add a Dingbat/ Font to a ‘Layer’, and make that type Layer the active Layer in the Layers Panel.
Go Big, (with Fonts) … say, 500 pt in size.

2. Go to the ‘Layers’ Menu Option, and choose ‘Type’, Then ‘Convert to Shape’. (Layer > Type > Convert to Shape)
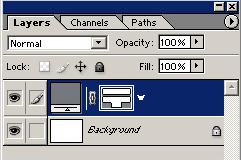
3. This is what the ‘Layers Panel’ should now look like. The Font is now a ‘Shape’, just as if you’ve used the ‘Ellipse’ or ‘Rectangle’ tool.
4. Now go to your ‘Tool Bar’ and Select/Click & Hold the ‘Pen’ Tool’, then choose add ‘Add Anchor Point’ (The One with the + Sign next to it) Tool option.
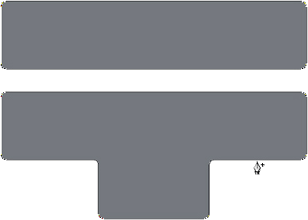
5. Click anywhere along the Edge of your newly converted Shape. You can see in the image right where I clicked (left).
Then click to add an Anchor Point to the shape. (Right)

6. Activate the ‘Direct Selection Tool’ from the Toolbar.
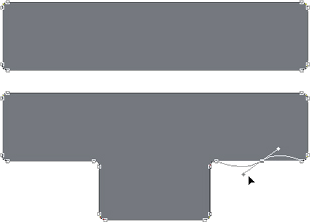
7. Now go back to the previous ‘Anchor Point’ you created, and to the left and right of it, you’ll notice theres actually an Anchor Bar there now, with two end co-oridnates…… Click on one of those end co-ordinates to re-define the shape. (You’ll see what happens…)
8. Repeat process for as however many ‘Anchor Points’ you want to manipulate…All I did here was repeat the process to the other side of the Font to equal the other side.

Nothing fancy here..just did a couple of more of the above to show you where it could go….then your imagination should kick in.