Picking up from the previous lesson (II), I’ll show you how to tie in this nifty flash animation with multiple links without having to resort to slices.
The key to adding multiple links without slices to a flash animation is to use Image Maps.
Note: Output to flash does not allow Rollover effects, so it would be worth your while to indicate to your user what exactly is a hot spot link. (Ie. Click here, etc)
-
Picking up where lesson two left off:
Select the ‘Rectangle Image Map Tool (P)’ from the Toolbar and draw individual Image Map’s for the following three hotspots.Go ‘Window > Image Map’ to open the Image Map Palette, select the ‘Image Map Select Tool (J)’ from the Toolbar, click each of the newly created image map’s from step 1 and set the desired parameters as I have captured. (Note: URL = internal or external, realtive or absolute)URL= http://www.adobe.com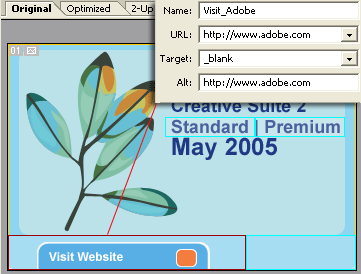
URL= http://store.adobe.com/store/products/master.jhtml?id=catCreativeSuiteSTD

URL= http://store.adobe.com/store/products/master.jhtml?id=catCreativeSuite

-
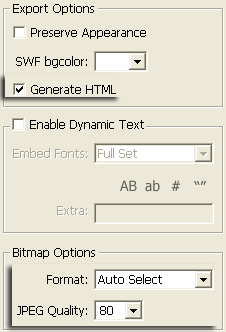
Select Frame 1 again, go ‘File/Export/Macromedia Flash Swf…’ and set the following options.
Here is the final output.
Click the three newly created hotspots to go to the appropraite links.(Refresh the page to preview again or preview in its own window.)
Summary:
1. Prepare Vector based elements before you begin the animation process.
2. Avoid Layer Masks, Layer Styles and Bitmap’s where possible to minimize file size.
3. Tween – Only use the Parameter’s where necessary. IE – I only needed to use ‘Position’.
4. Place Iamge Map Hotspots for linking (internal or external).
5. Export as Swf – disable the Preserve Appearance feature when just using Vector shapes.