Here’s a neat trick to apply a single click transparency trick straight inside the ‘Save For the Web’ control panel.
This works best if its’s an indexed image, if your working to create a transparency to a flattened file, a pasted or imported file.
Below is simple image with just a few colors on a background of white.

Next, open the ‘File/Save for Web’ control panel. (Alt + Shift + Ctrl + S / Mac: Option + Shift + Command + S)
Of primary importance is the ‘Optimized File Format’ (.Gif), the ‘Color Reduction Algorithm’ (Selective) and a view of the individual colors of you image within the ‘Color Table’.
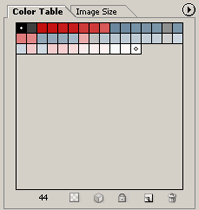
For this basic image, the bottom of the ‘Color Table’ indicates there are 44 colors (outlined in blue).
The first and last colors correspond to Black and White (outlined in green) with the remaining colors of the image in between.
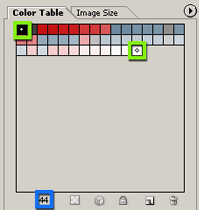
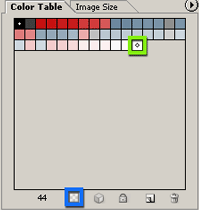
Next, simply select the last color block in the ‘Color Table’, and click the ‘Maps Selected Colors to Transparent’ button (outlined in blue) on the bottom.
As indicated in the below screen shot link, the white has been made transparent in the image, in a single click.
Click ‘Save’ to save your transparent image.
Other Tips within the Save For Web
For the above sample, the same would apply if you wanted to ‘map’ any color to transparency, other than just the background color.
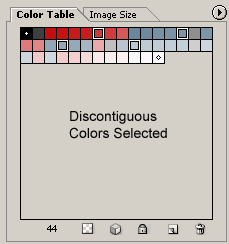
To apply multiple colors to the ‘Map’ option, simply, hold the Ctrl key (Mac: Command key) to select discontiguous colors …
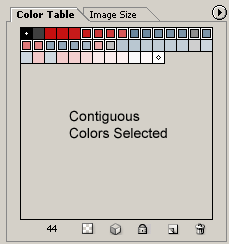
… or hold the Shift key to select contiguous colors.
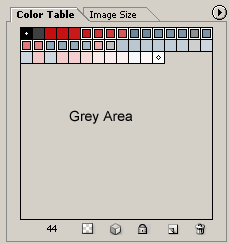
To remove colors from the selection (perhaps selected by mistake), simply click in the grey area just below the Color Table.